Portfolio - Documentation
- GLPI Update (with GLPI 11 Upgrade investigation)
- Microsoft Secure Boot Certificate Update
- Clone a New Workstation from an old one
- Clonezilla
- SystemRescueCD
GLPI Update (with GLPI 11 Upgrade investigation)
Turn ON Maintenance Mode
Before backing up, you must enable maintenance mode.
cd /var/www/glpi php bin/console glpi:maintenance:enable
Backups
First, you have to backup some data before processing any upgrade
-
backup your database;
mysqldump -u root -p --databases glpi > /root/backup/glpi-oldversion.sql-
backup your config directory, especially for your GLPI key file (config/glpi.key or config/glpicrypt.key) which is randomly generated; backup your files directory, it contains users and plugins generated files, like uploaded documents; backup your marketplace and plugins directory.
mkdir /root/backup/backup_glpi/glpi-old_versioncp -Rf /var/www/glpi/ /root/backup/backup_glpi/old_version
Check soft version
Before attempting any upgrade, you need to check the version of the software to make sure if it is compatible!
cd /var/www/glpi php bin/console glpi:system:check_requirementsphp bin/console glpi:database:check_schema_integrity|
GLPI 10.0.5 |
GLPI 10.0.10 |
GLPI 11.0.0 |
|
PHP Minimum : 7.4 PHP Maximum : 8.2 |
PHP Minimum : 7.4 PHP Maximum : 8.3 |
PHP Minimum : 8.2 PHP Maximum : ?? |
|
MariaDB Minimum : 10.2 |
MariaDB Minimum : 10.2 |
MariaDB Minimum : 10.5 |
|
Ubuntu 20.04 LTS |
Ubuntu 22.04 LTS |
Ubuntu 24.04 LTS |
|
PHP 7.4 |
PHP 8.1 |
PHP 8.3 |
|
MariaDB 10.3 |
MariaDB : 10.5 |
MariaDB : 10.6 |
With this example, you can see that GLPI 10.0.10 requires Ubuntu 20.04 minimum.
But GLPI 11.0.0 requires Ubuntu 22.04 minimum.
Do not upgrade your system or GLPI without checking the versions of the components supported by GLPI !
Update GLPI version
Remove the old GLPI version
rm -Rf /var/www/glpi/Download the latest GLPI version and uncompress it
cd /root
wget https://github.com/glpi-project/glpi/releases/download/XX.X.X/glpi-XX.X.X.tgz
tar -xvf glpi-XX.X.X.tgzMove it to the right location and add the version number in the folder name
mv glpi /var/www/glpiRestore Data
cp -Rf /root/backup/backup_glpi/your_version/glpi/files /var/www/glpi/
cp -Rf /root/backup/backup_glpi/your_version/glpi/plugins /var/www/glpi/
cp -Rf /root/backup/backup_glpi/your_version/glpi/config /var/www/glpi/
cp -Rf /root/backup/backup_glpi/your_version/glpi/marketplace /var/www/glpi/
Change the symlink to make it point on the latest version (and ensure the file are owned by www-data)
chown -R www-data:www-data /var/www/glpi/Check the database integrity
cd /var/www/glpi/latest/bin
php console db:checkIf all good then update the database
cd /var/www/glpi/bin
php console db:updateRemove the installer
rm /var/www/glpi/install/install.phpGLPI should now be updated.
Microsoft Secure Boot Certificate Update
Microsoft Secure Boot Certificate Expiration
Two crucial Microsoft Secure Boot certificates are set to expire in June 2026. They are:
- Microsoft Corporation KEK CA 2011 (stored in KEK)
- Microsoft UEFI CA 2011 (stored in DB)
In addition, another critical Microsoft Secure Boot certificate expires in October 2026.
- Microsoft Windows Production PCA 2011 (stored in DB)
When these certificates expire, devices may fail to recognize trusted bootloaders, and future Secure Boot policies may not be applied. Updating the certificates ensures continued protection against malicious rootkits and ensures Windows firmware compliance
Turn off temporary Bitlocker Encryption
Before applying this, ensure that your BitLocker recovery keys are backed up and accessible. Suspend BitLocker (Suspend-BitLocker) before the first reboot to prevent user lockouts.
I highly recommend including it when cloning machines, because when switching machines, people will have a different BitLocker key.
Suspend-BitLocker -MountPoint "C:" -RebootCount 2
Get-BitLockerVolume -MountPoint "C:" | Select-Object ProtectionStatus
Updating Microsoft UEFI Certificates
Status
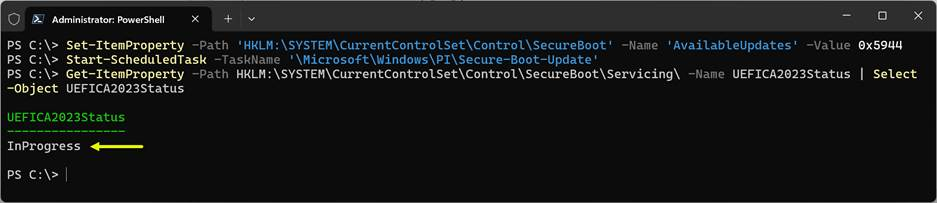
To begin, administrators can check the status of the update process by reading the value of the UEFICA2023Status registry key.
Get-ItemProperty -Path HKLM:\SYSTEM\CurrentControlSet\Control\SecureBoot\Servicing\ -Name UEFICA2023Status | Select-Object UEFICA2023Status

Update
To initiate the update process, set the value of AvailableUpdates to 0x5944.
Set-ItemProperty -Path ‘HKLM:\SYSTEM\CurrentControlSet\Control\SecureBoot’ -Name ‘AvailableUpdates’ -Value 0x5944
Next, start the Secure-Boot-Update scheduled task.
Start-ScheduledTask -TaskName ‘\Microsoft\Windows\PI\Secure-Boot-Update’
Once complete, the UEFICA2023Status indicates InProgress.
Your computer can freeze for a few minutes.
After a reboot, start the Secure-Boot-Update scheduled task once more. The UEFICA2023Status should indicate that it has been updated (may require one more reboot!).
it’s done.
Clone a New Workstation from an old one
Step 1 (DELL) : Antivirus scan
Before cloning the old PC, it is best to run an antivirus scan with Eset Online Scanner, ADWCleaner, and Bitdefender to avoid cloning viruses onto a new machine.
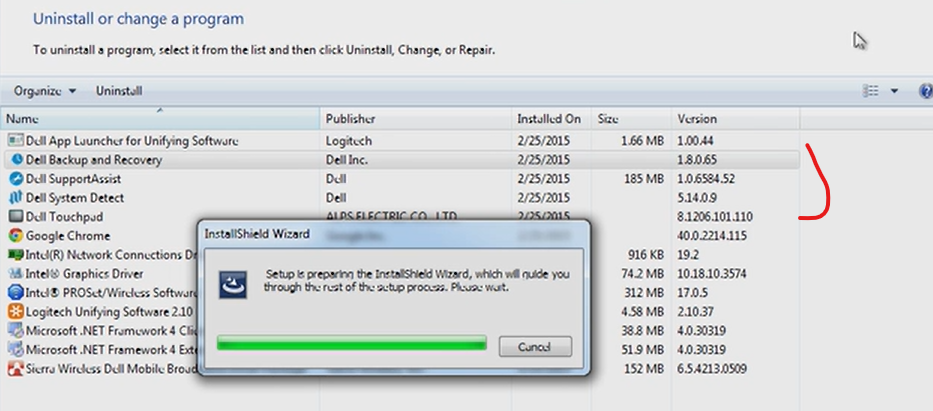
Step 2 (DELL) : Uninstall unnecessary software
Before cloning, it is best to uninstall any software from the machine, such as Dell Software, Dell Support Assist, Dell PowerManager, etc.
To do this, go to the control panel >> uninstall a program and filter by Dell.
Next, check in Settings >> Applications to see if there are any DELL UWP applications not listed in the control panel.
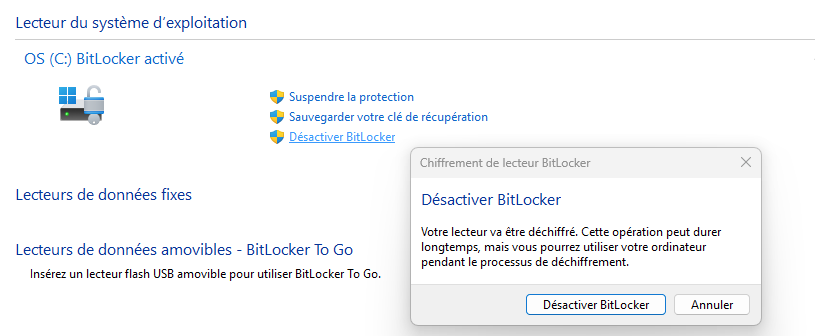
Step 3 (both) : Disable Bitlocker
Before cloning a machine, it is best to disable BitLocker so that Clonezilla can fully access the machine's hard drive.
Don't forget to disable BitLocker on the second hard drive D: and check whether the user has any data to back up. If so, you should place it on C: if possible.
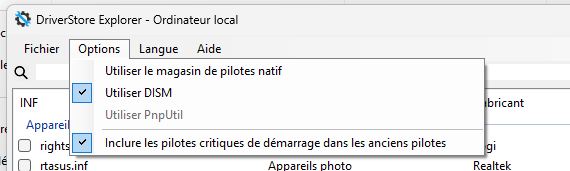
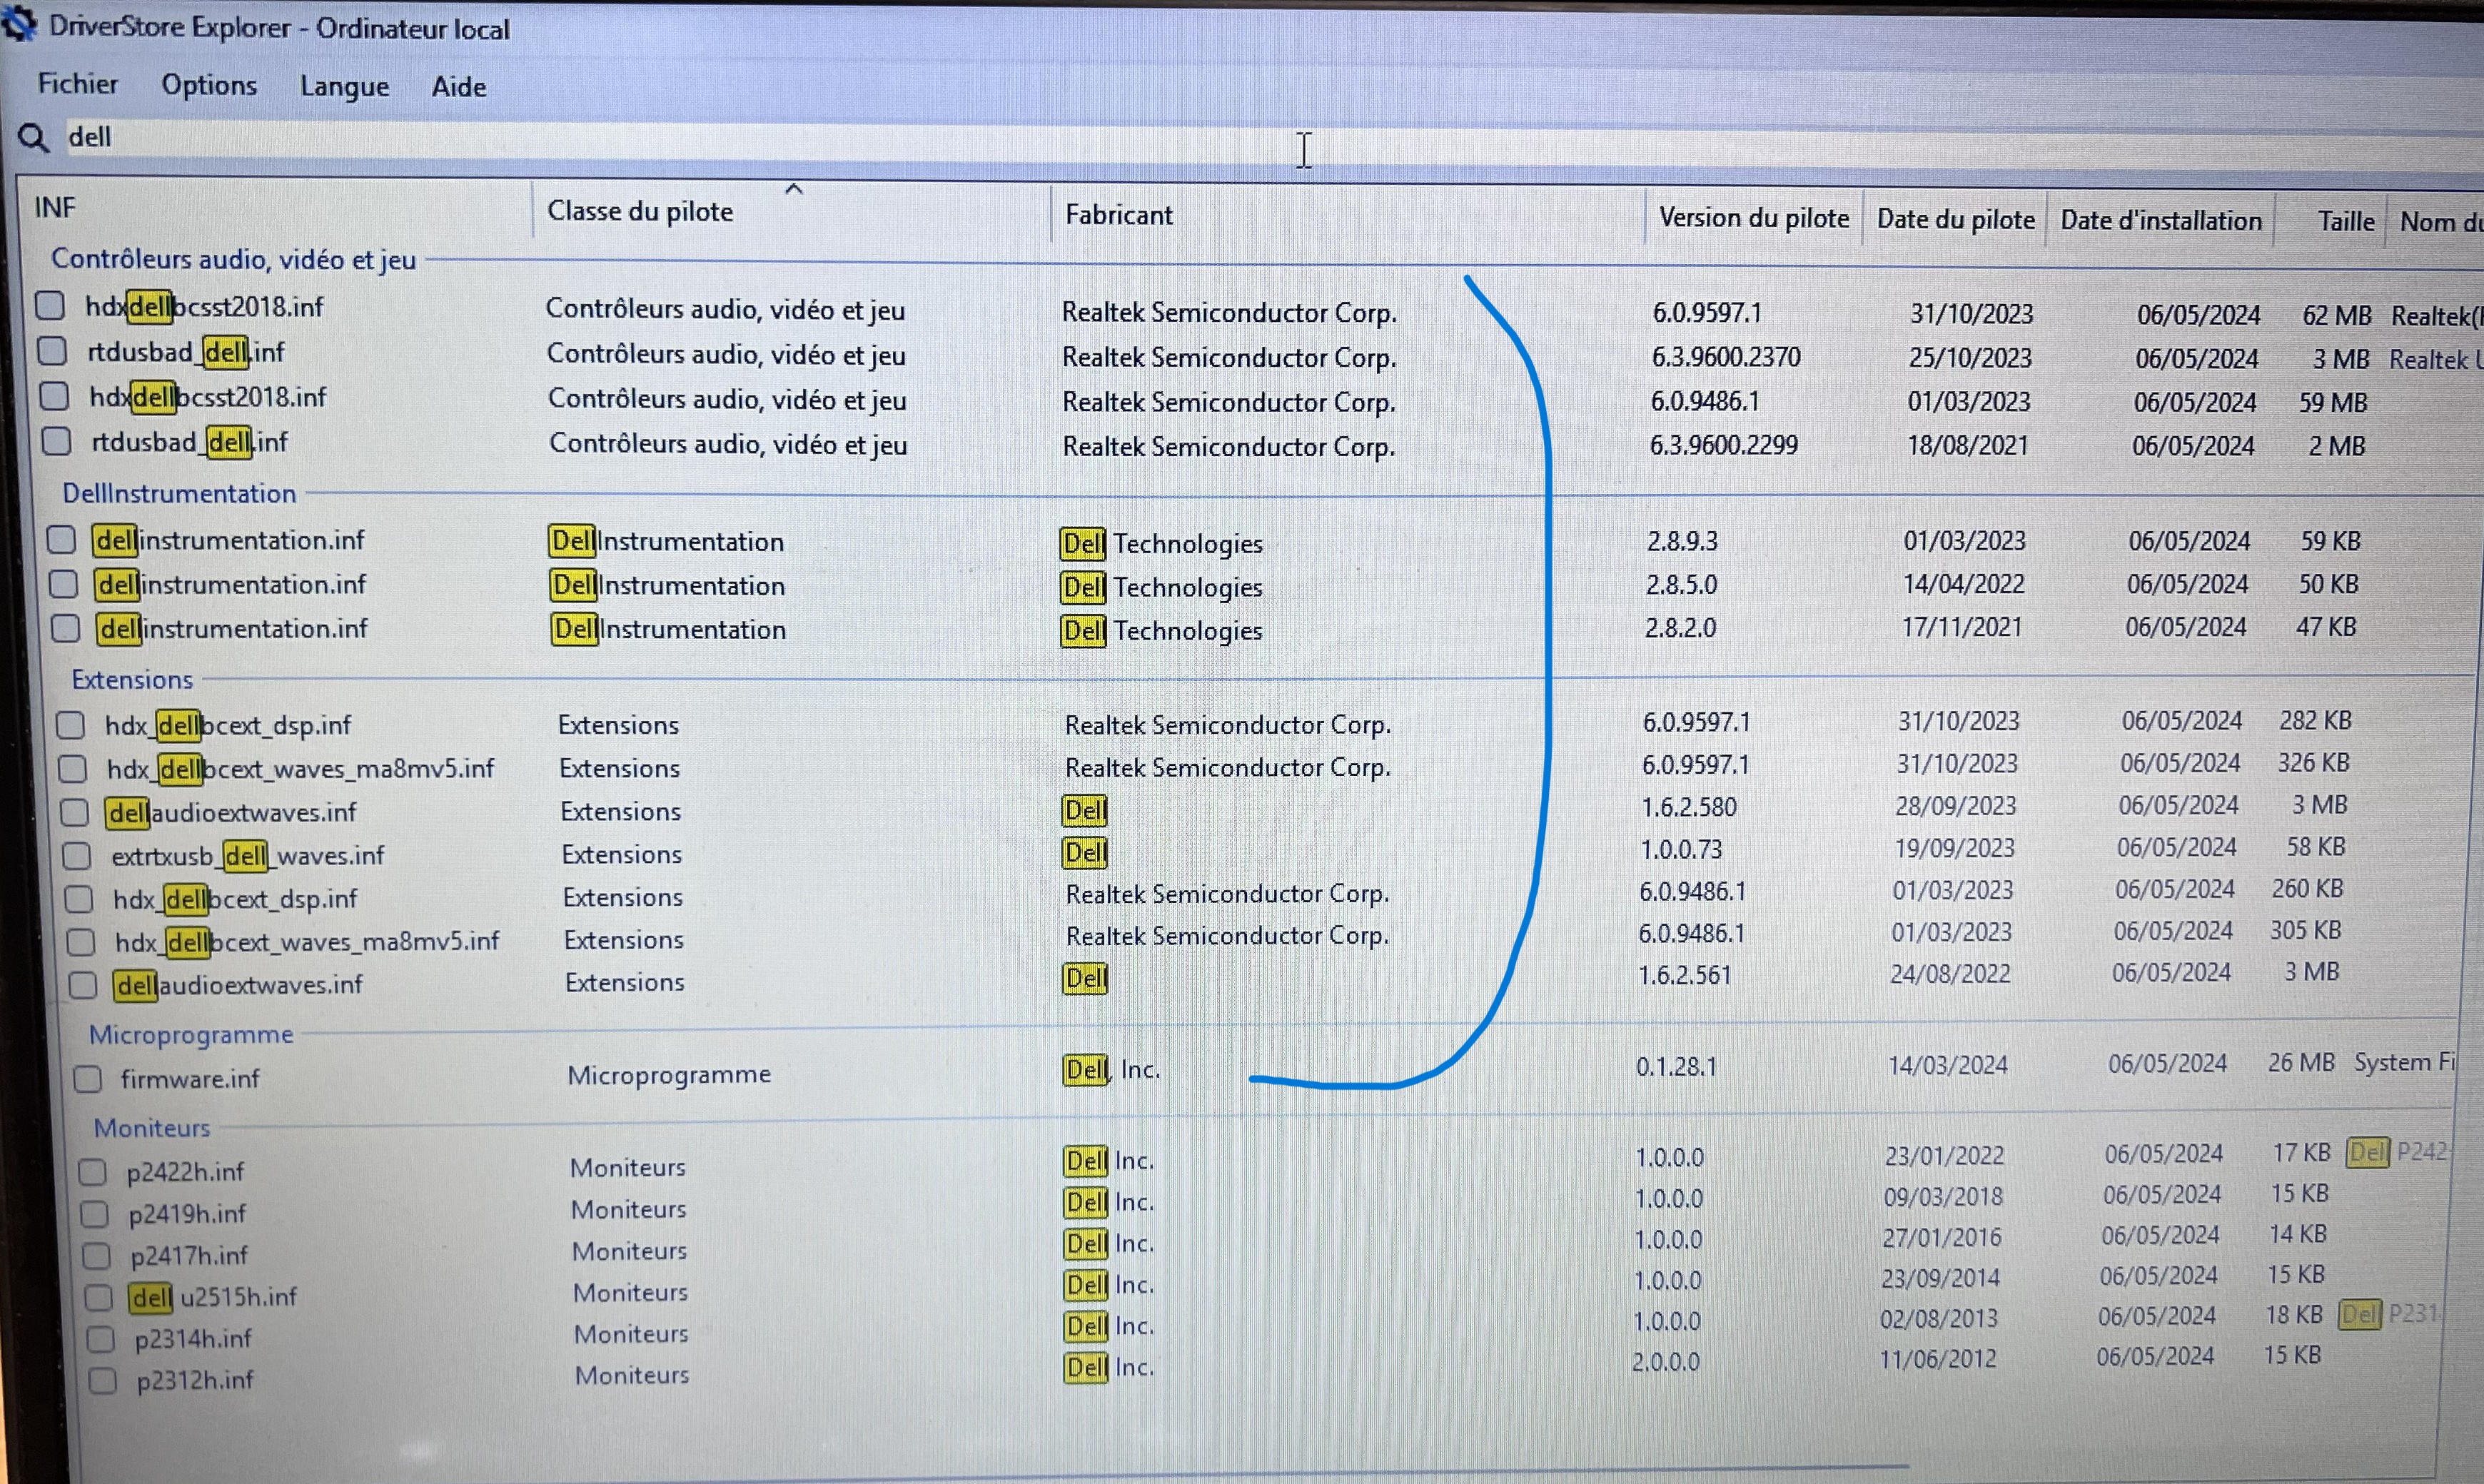
Step 4 (DELL) : Uninstall previous Dell Drivers with DISM
To avoid startup problems or duplicate drivers, you must uninstall the Dell drivers.
Except for the monitor drivers.
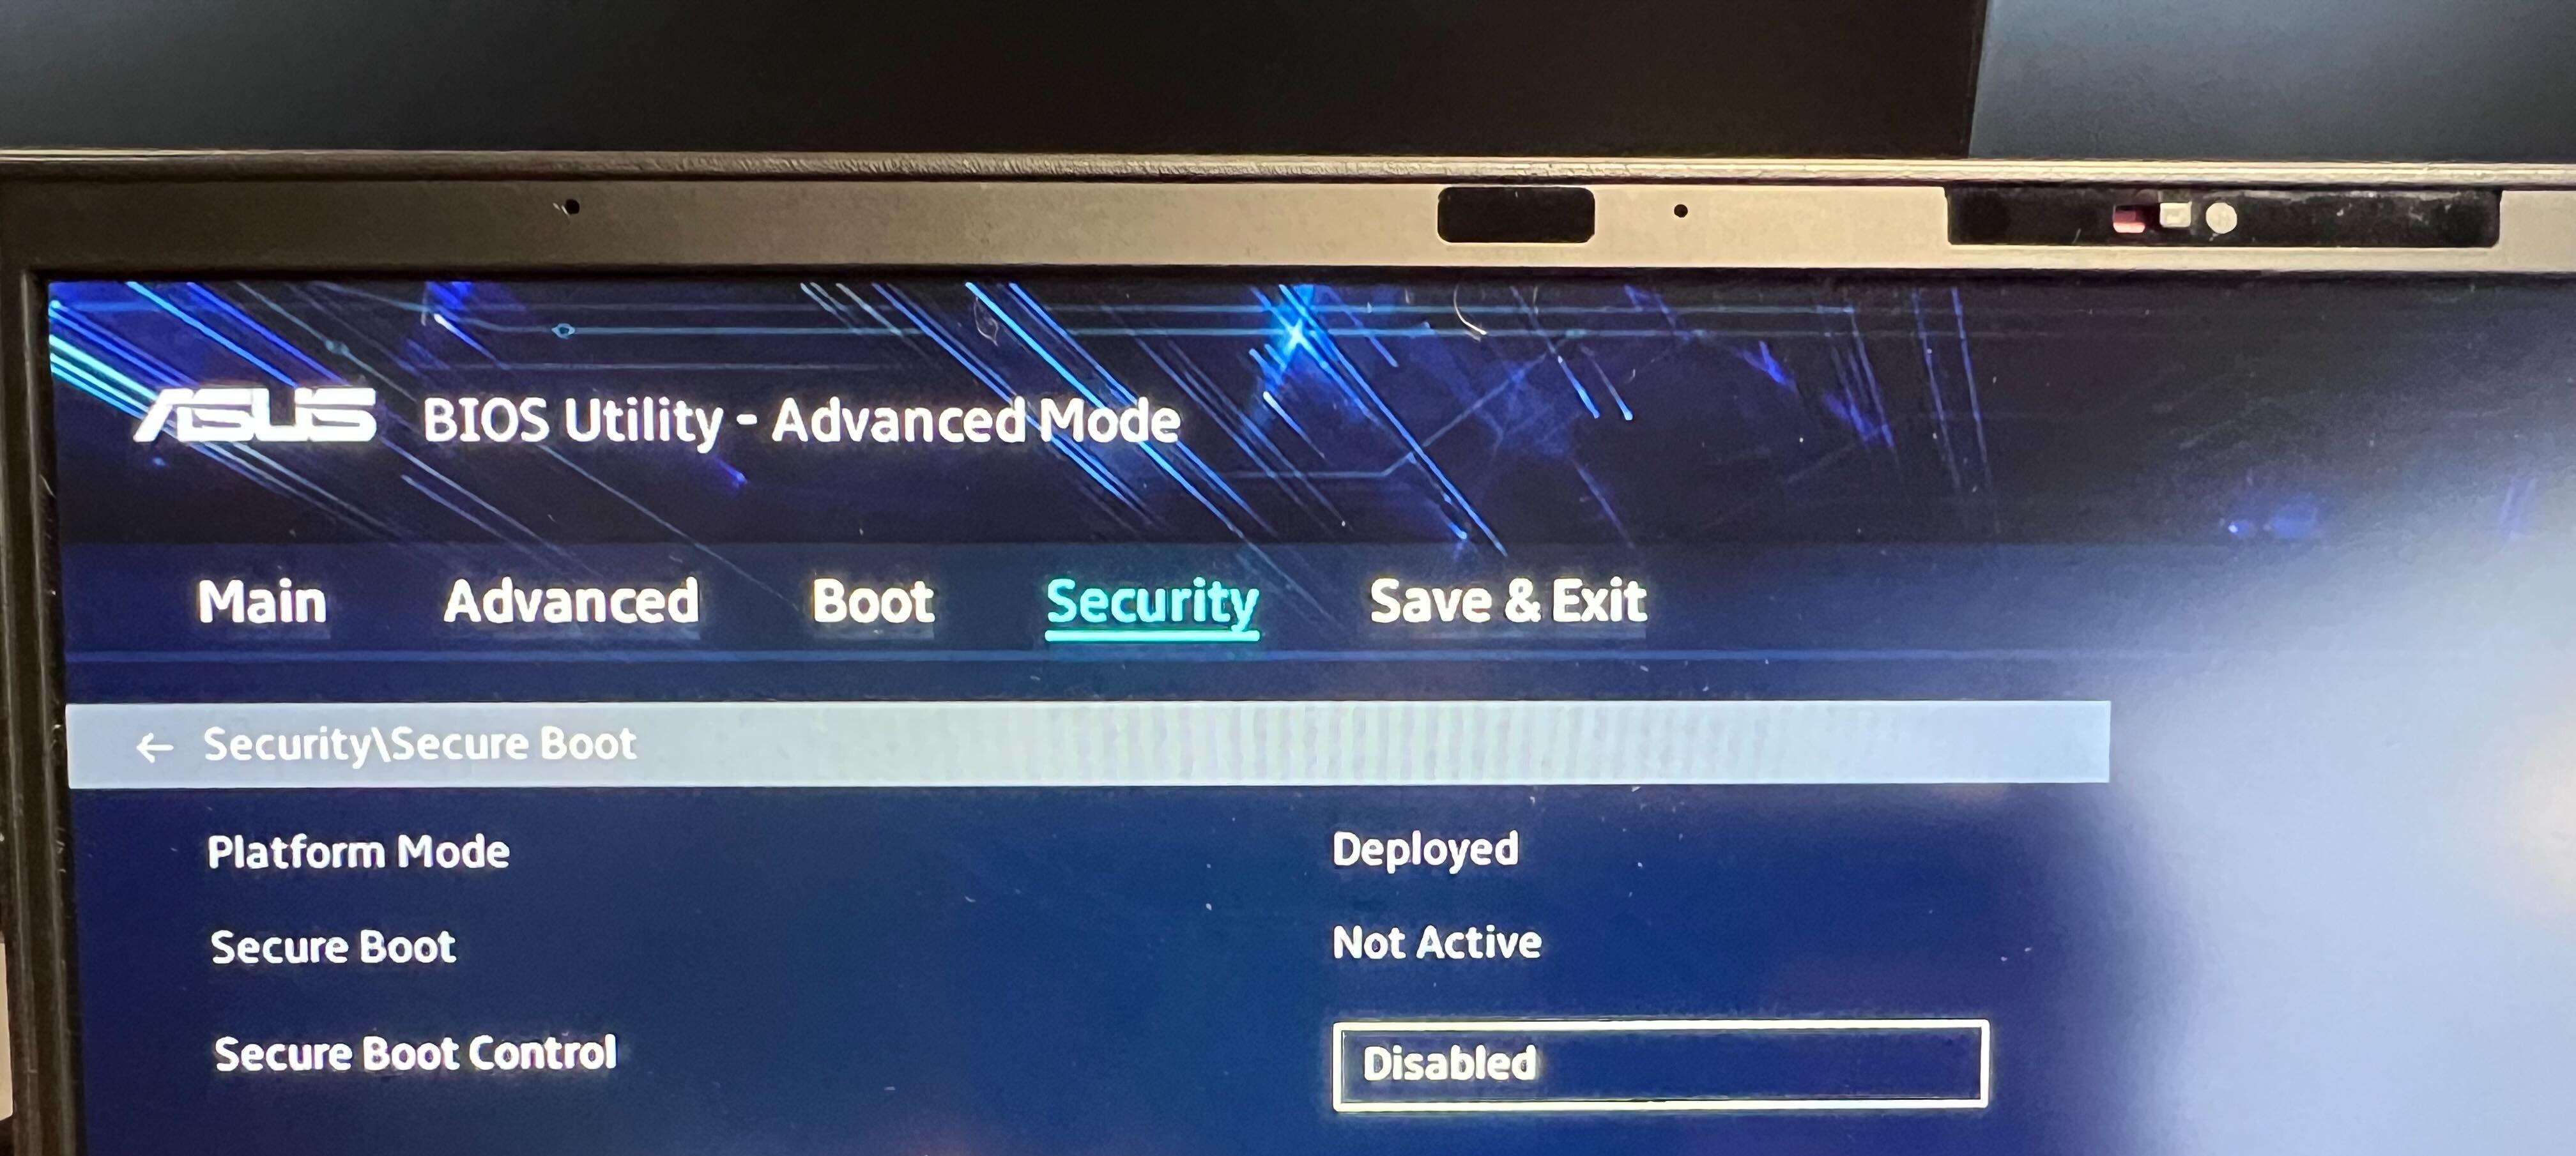
Step 5 (both) : Disable Secureboot
It is best to temporarily disable secureboot in order to boot into clonezilla, as it does not contain a secureboot key by default.
Remove the old secure boot keys if you can...

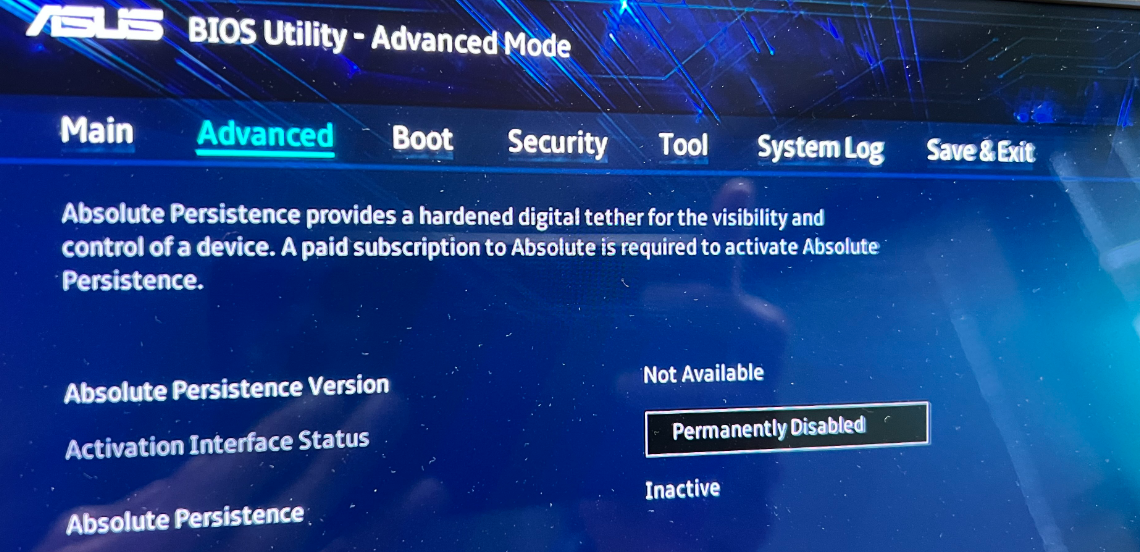
On the new Asus 2025, you also need to disable the advance persistence module to be able to boot into Clonezilla.
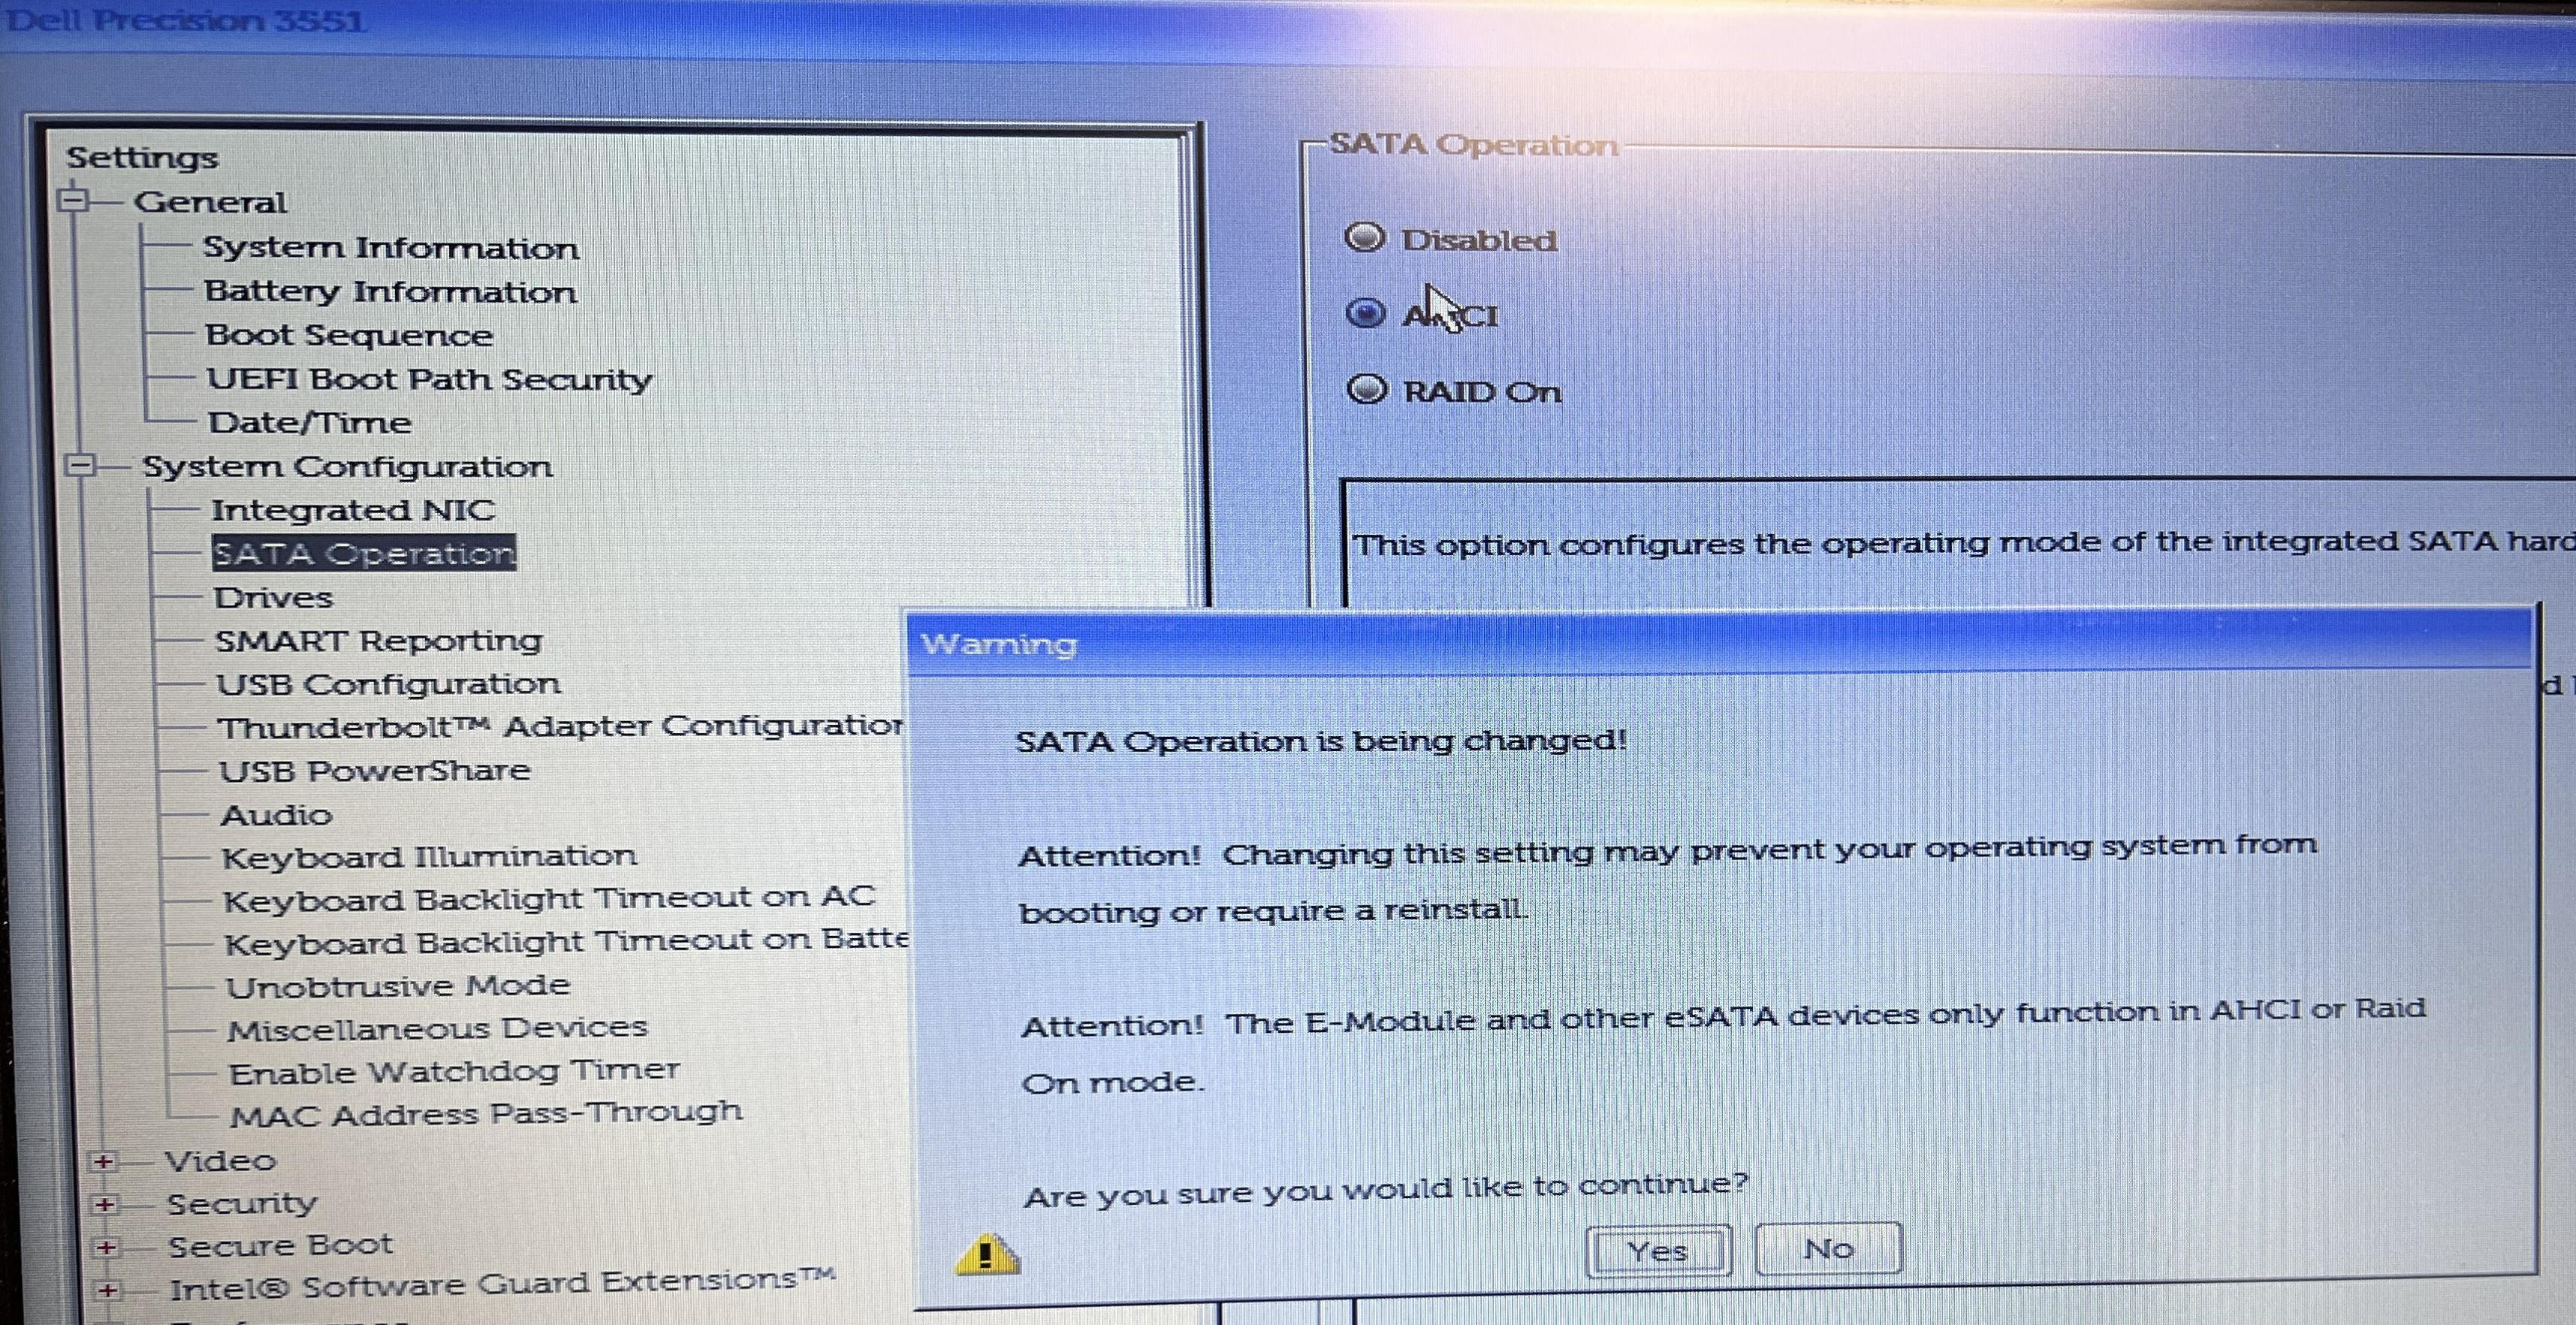
Step 6 (DELL) : Disable the RAID to boot into Clonezilla
Please note that by default, if you restart, the Dell will render the inaccessible boot device, and you only need to switch back to RAID mode if you want to power on the Dell machine again. However, for cloning, we need to be in AHCI mode so that Clonezilla can see the disk.
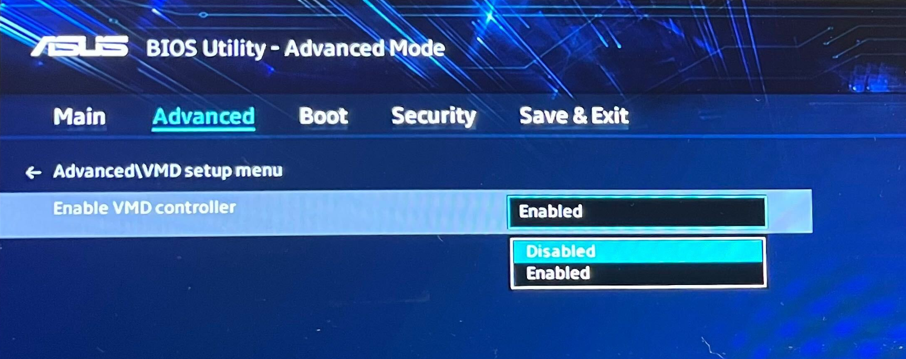
Step 7 (ASUS) : Disable the VMD
The VMD controller manages NVMe SSDs and enables RAID functionality; it should be disabled if RAID is not desired to simplify system management and improve compatibility with standard drivers.
In the case of cloning a machine, the VMD controller should be disabled to avoid driver conflicts and ensure the cloned system can boot properly without needing special RAID drivers.
This option is only available on the Asus 2022, you normally don't need it on the Asus 2025.
Step 8 (both) : Choose a method for cloning
I highly recommend using Clonezilla, as it is the safest and fastest method.
Alternatively, you can use systemrescuecd if the Clonezilla method does not work. But keep in mind that the systemrescuecd method requires more patience because it takes longer, copying block by block rather than just the used space.
Step 9 (both) : Enable Secureboot
After using Clonezilla, we no longer need to leave Secure Boot disabled; we must enable it to ensure that BitLocker will work afterwards.
Step 10 (DELL) : Enable RAID
To restart Windows correctly on the Dell, you must enable RAID mode.

Step 11 (ASUS) : Check Windows Health
Check the partition table : (recommended)
chkdsk C: /f /rCheck if any file has corrupted : (recommended)
sfc /verifyonlyif your system has corrupted run : (if required)
sfc /scannowreboot neccessary
Check DISM health : (recommended)
Dism /Online /Cleanup-Image /CheckHealthDism /Online /Cleanup-Image /ScanHealthif your system has corrupted run : (if required)
DISM /Online /Cleanup-Image /RestoreHealthreboot neccessary
Usually after an upgrade you need to run : (if required)
Dism /Online /Cleanup-Image /StartComponentCleanupreboot neccessary
Step 12 (ASUS) : Uninstall previous Dell Drivers with device manager
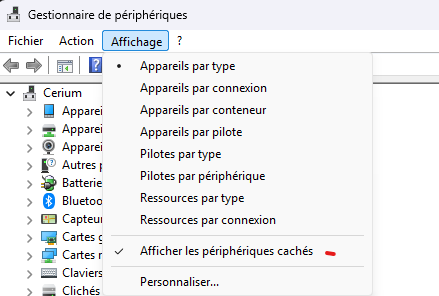
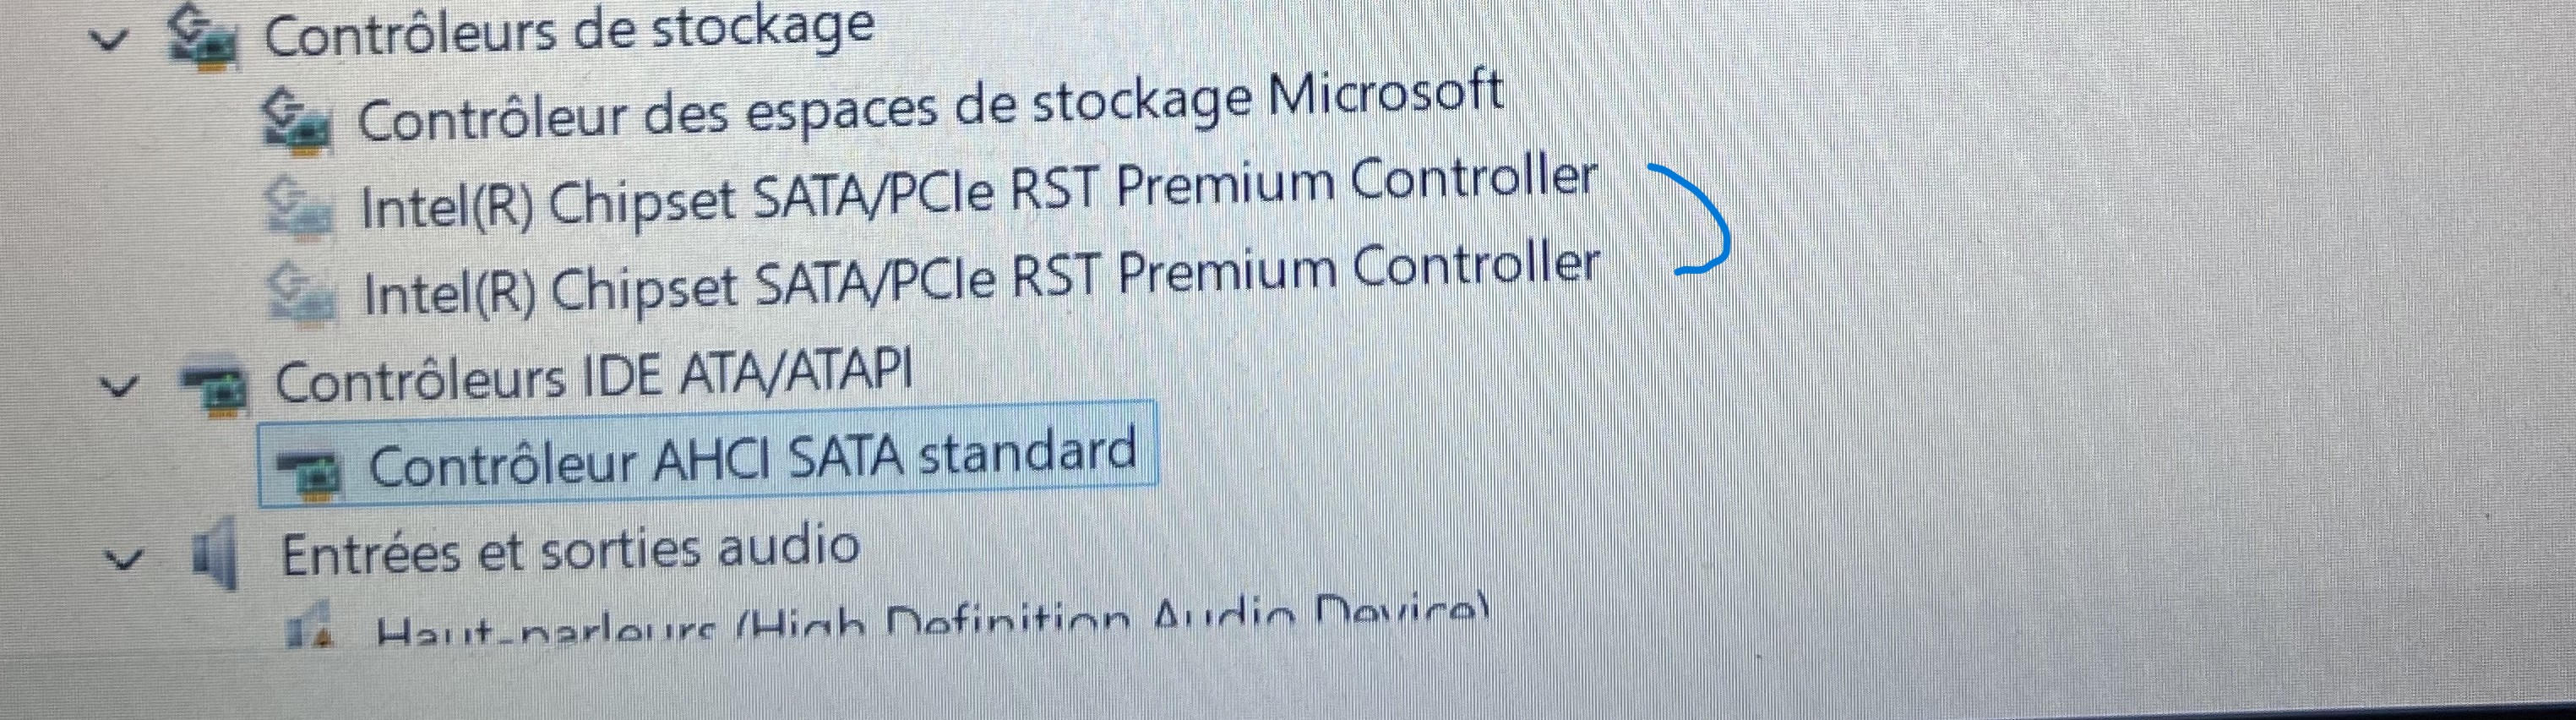
You need to remove drivers from the old laptop on device manager,
like ACPI, Graphics card, sound card,network card (not fortigate), storage controller, old hard drive…
The old drivers will be grayed out because they are not currently in use on the new machine, so you can delete them.
Do not uninstall a driver that is not grayed out and currently in use !
For Bluetooth devices, it is best to uninstall them and then reinstall them afterwards. This is because the old pairing corresponds to the old card.
To do this, first uninstall your old Bluetooth device in Device Manager, then go to Settings and delete the Bluetooth devices. You can then pair them again once the drivers have been reinstalled.
Step 13 (ASUS) : Remove previous HardwareID (Regedit)
Ordinateur\HKEY_LOCAL_MACHINE\SOFTWARE\Microsoft\Windows\CurrentVersion\OEMInformation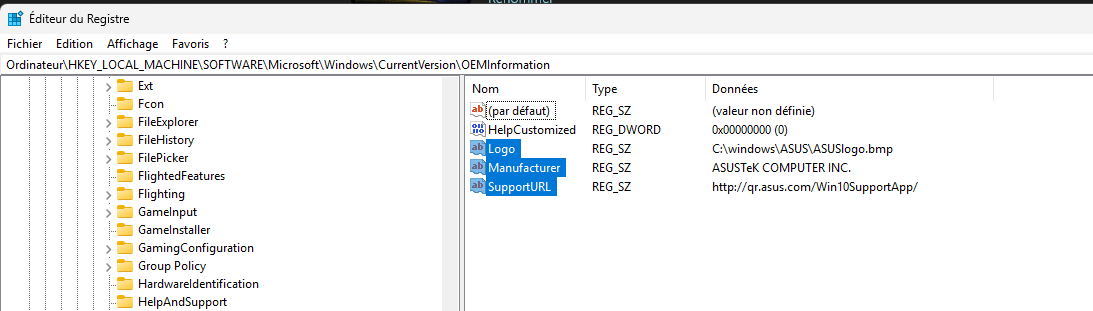
You need to remove these 3 registry keys to change the machine name; obviously, in your case, it will say Dell something...
After a restart, your machine will have retrieved the SMBIOS HWID.
Step 14 (ASUS) : Stop wuauserv and remove Software Distribution
To avoid installing the drivers and BIOS from your old machine on the new one, you need to delete the contents of the Windows Update folder.
To do this:
Go to services.msc >> Windows Update, set the service to manual, and stop the service.
Go to C:\Windows\ >> delete the contents of the Software Distribution folder >> When the Windows Update service restarts, it will recreate the folder.
Step 15 (ASUS) : Install New drivers and My asus software
copy [Asus Experbook B9400CEA (2022) Drivers Auto-Install] to the new laptop.
Unfortunately for the Asus 2025, the Asus auto-installer is not compatible with the machine, so you must either install the drivers manually or use Windows Update.
Launch the installation on the laptop.
After that reboot the computer and start Windows Update.
Don't forget to install MyAsus via the Microsoft Store to monitor fan performance and charging.

Step 16 (ASUS) : Rename the new machine after a restart
To do this, you need to connect to the VPN and temporarily remove the machine from Active Directory and change the name.
After a reboot, you can get back on the ad.
Step 17 (ASUS) (Optional) : Remove old Windows Activation Key
If you have activation problems, you can reset the Windows license.
This is done using the hardware ID.
To do this, run the following command :
slmgr /upk Next, go to Settings > System > Activation and run troubleshooting if Windows has not activated you automatically; it should search for the license based on your new machine and activate it automatically.
Check the activation with :
slmgr /dlvIf you encounter a product key error, don't panic!
Open Powershell 5.1 has administrator :
(Get-CimInstance -ClassName SoftwareLicensingService).OA3xOriginalProductKeyAfter finding your key, please enter this command with the key.
slmgr /ipk XXXXX-XXXXX-XXXXX-XXXXX-XXXXXForce activation :
slmgr /atoCheck activation Status :
slmgr /dlvThis does not disable Office; Office may be disabled because the machine has changed its hardware ID, not because of this command!
Step 18 (ASUS) : Move the new machine on bitdefender
After the machine name change, it should be automatically added to Bitdefender with its new name; you must place it in the correct folder of the service to which this machine belongs.
Step 19 (ASUS) : Reinstall the GLPI agent
After that, you need to run an inventory to make sure the machine is correctly listed in GLPI.
To do this, launch your internet browser and go to http://localhost:62354/
Step 20 (ASUS) : Update Microsoft Secure Boot Certificate
You absolutely must update the certificates on your machine before June 2026 using this procedure :
Step 21 (ASUS) : Enable Bitlocker on the new machine
-
Activate Bitlocker
Click on Manage BitLocker in the search results
Under Operating System Drive, click on Enable BitLocker. If you have multiple disks, you’ll have to repeat all the steps.
(The following error may appear: This device cannot use a secure platform module (TPM). Your administrator must set the option "Allow BitLocker without a compatible secure platform module"…)
-type Group Policy
-in the search results, click Edit Group Policy
-in the tree on the left of the window that opens, go to: Computer Configuration > Administrative Templates > Windows Components > BitLocker Drive Encryption > Operating System Drives
-in the list of settings that now appears on the right, look for the line Require additional authentication at startup and double-click it
-then check the Enabled box, making sure that the Allow BitLocker without a compatible secure platform module box is checked
-click on OK
-
Choose the unlocking method
Choose the last option: Let BitLocker automatically unlock my disk → no password will be required at each start of the computer
-
Select the saving method for the recovery key
Save it in a file on an external key or print it temporarily, as we will save it in the password vault later
It’s not recommended to save it on a Windows account
Choose between encrypting the disk space or the entire disk
Choose the encryption mode
Opt for Compatible mode
After restarting the computer, BitLocker should be enabled. You can verify either on the File Explorer with a small lock icon on your disk or in the settings System > Storage > Disks & volumes
Step 22 (ASUS) (Optional) : Check office Licence activation
After cloning, you may need to activate Office, as the license is assigned by hardware ID.
Step 23 (both) (Optional) : Troubleshooting in case of problems
If you follow this tutorial carefully, you should not encounter any problems, but if your hardware is new or unusual, you may need to adapt it.
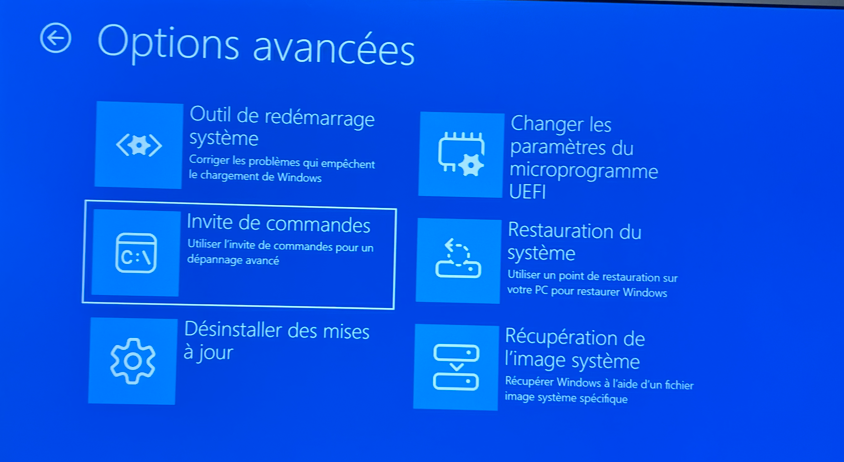
If you are stuck on “inaccessible boot device” but Windows manages to start in WinRE (you can also use a Windows installation USB key to access it)
The problem is usually with the VMD controller; Windows does not have the driver to start it. Normally, you should disable it before cloning to avoid this problem, but to troubleshoot it, you need to launch a command prompt.
Check if you can see the NVMe disk in DiskPart.
Find the VMD driver for your machine.
If not, install the driver. E: is, for example, your USB drive.
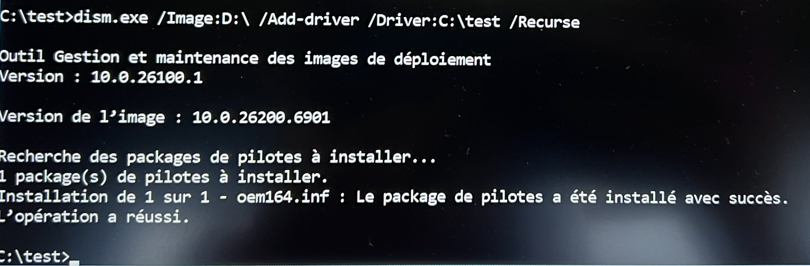
drvload E:\driversOnce the disk has been detected, you can inject the VMD driver into Windows using the DISM command.
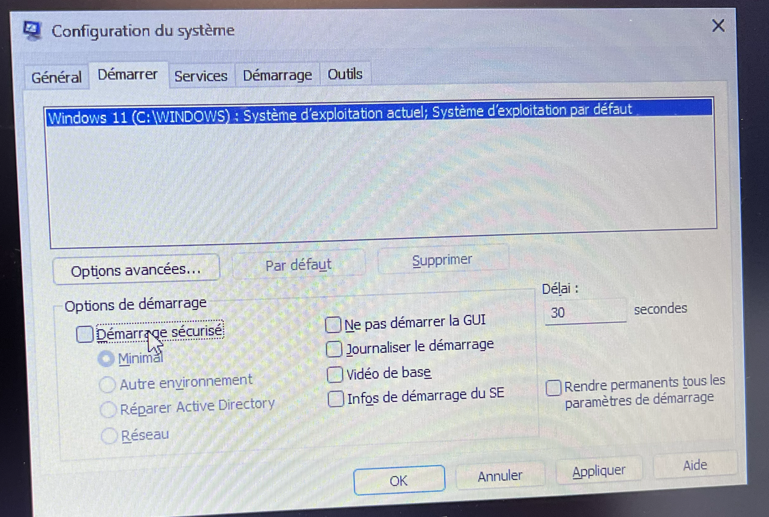
If you want to convert a Windows installation from RAID to AHCI because you are getting the error message “inaccessible boot device” you need to press Windows + R and type msconfig, check the “Minimal safe boot” option, and restart. Then you need to go into the BIOS, enable AHCI, and the system will automatically start with the AHCI drivers in safe mode. Wait a few minutes, then you can clone the machine while keeping AHCI mode enabled.
If you have problems integrating the drivers for the new machine, you can force Windows to search for and install the drivers by starting a fake Windows upgrade, downloading a Windows ISO, and running the setup. Once the setup has been launched with the settings to preserve data enabled, wait, and then clone with Clonezilla just before the first Windows restart. That way, Windows will be able to integrate the drivers for the new machine.

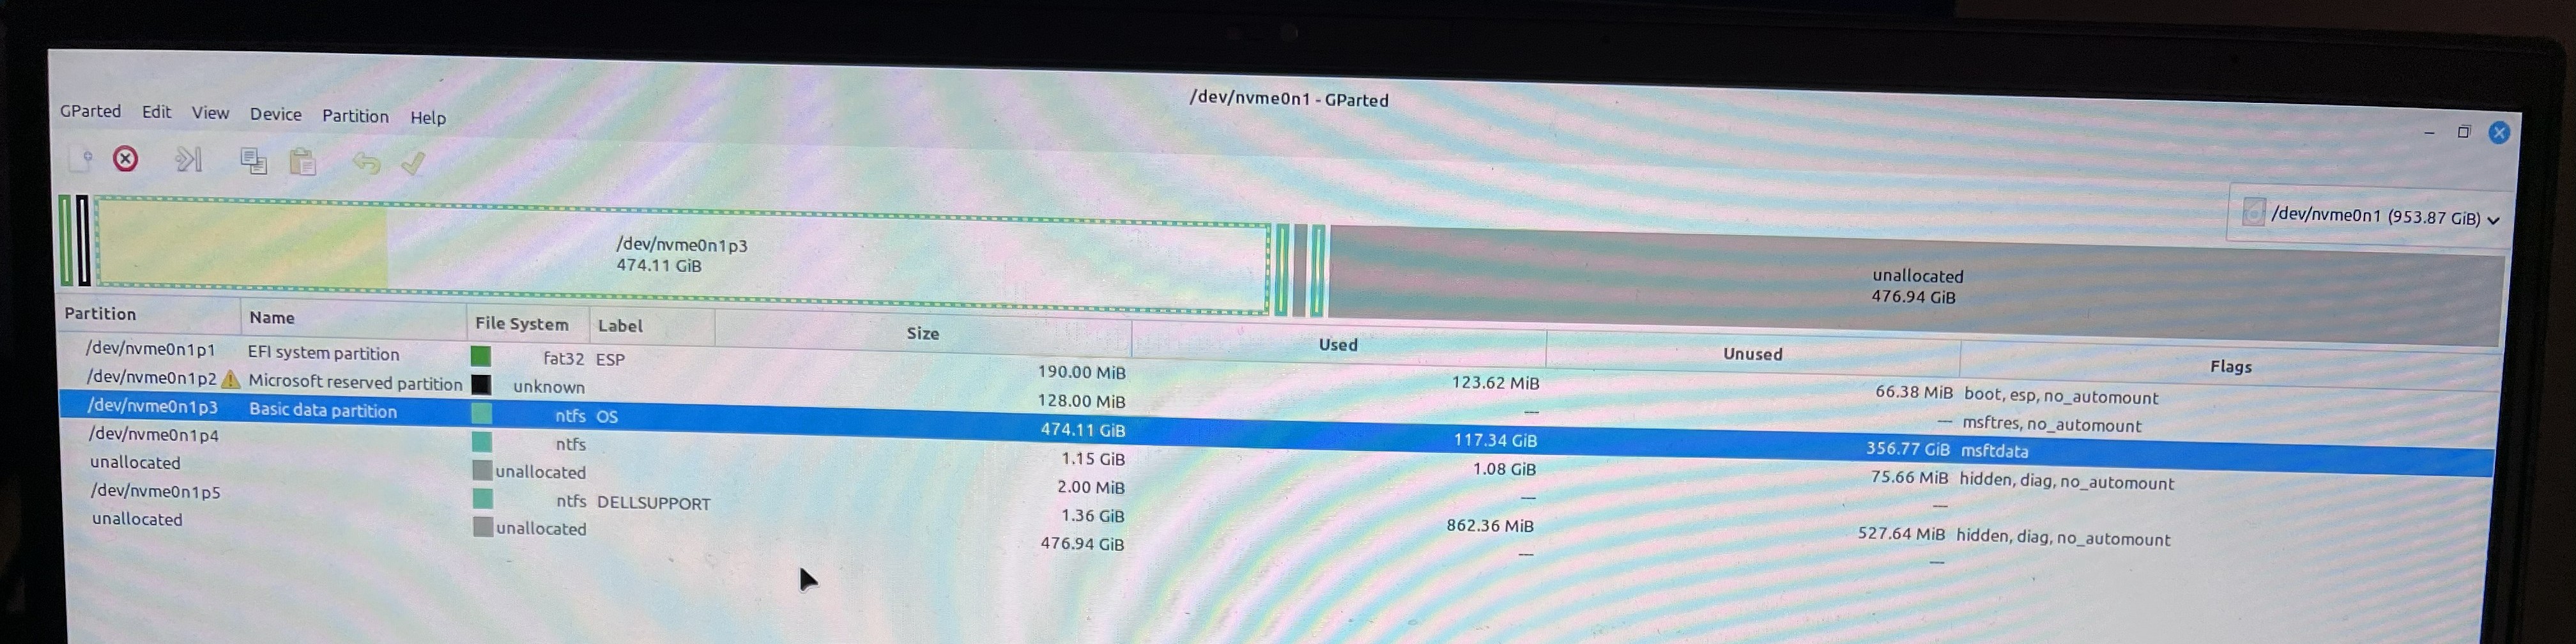
If you encounter problems resizing partitions, you can start systemrescuecd or LMDE with gparted, and resize the partition from Linux.
Clonezilla
You can use this method to clone a physical machine to another physical machine, or migrate a VMware ESXi VM to Proxmox...
Please note that Clonezilla cannot restore to a smaller disk; you must have a destination disk of the same size or larger.
If the source machine uses UEFI mode, the target machine must also be configured in UEFI mode.
Similarly, if the source machine is running in Legacy mode, the target machine must also be in Legacy mode.
This method works for both Windows and Linux, as long as Linux can properly see the disk.
Download Clonezilla :
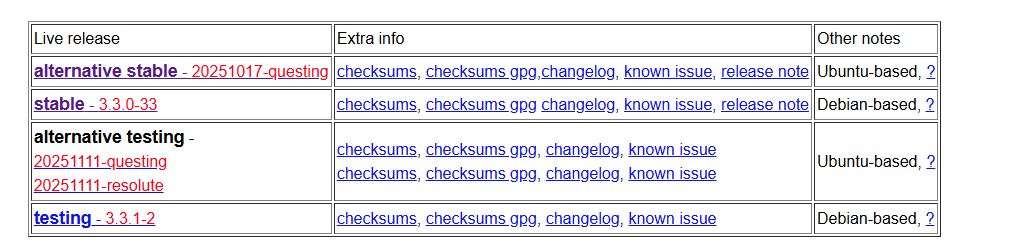
You need to choose which version of Clonezilla suits you best. You have a stable Debian version and a stable Ubuntu alternative version.
For an older machine, I recommend the stable Debian version. You won't have any problems.
But for a newer machine that requires a recent Linux kernel to ensure that the NVMe controller is recognized, use the stable Ubuntu alternative version.
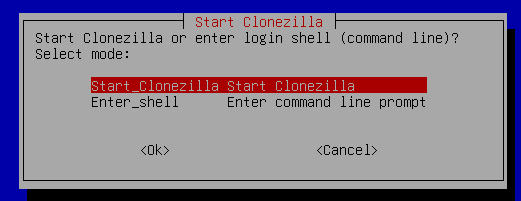
On Asus 2025 you may encounter problems starting clonezilla, in this case you must use the Start with copy file to ram mode option on clonezilla.
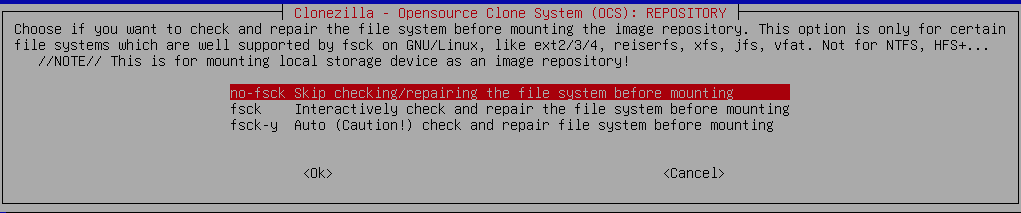
Clonezilla Configuration :
You can create an image if you need to act quickly with regard to the employee. For example, if they need to work on a project in the afternoon, you can create an image with an external hard drive at lunchtime and then restore their image when they are working. But be sure to warn them not to save any very important data during cloning, as the data content will obviously not be updated.
However, if the employee is flexible... You can use network cloning, provided that the local network is of good quality.
Cloning with an external hard drive :
You need to determine whether you want to clone over the network or use an external hard drive to create an image.
Don't forget to switch the RAID controller to AHCI so that the NVMe is detected.
Old machine :
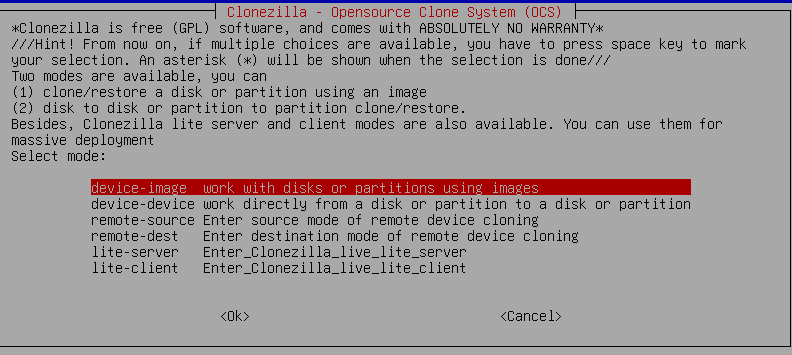
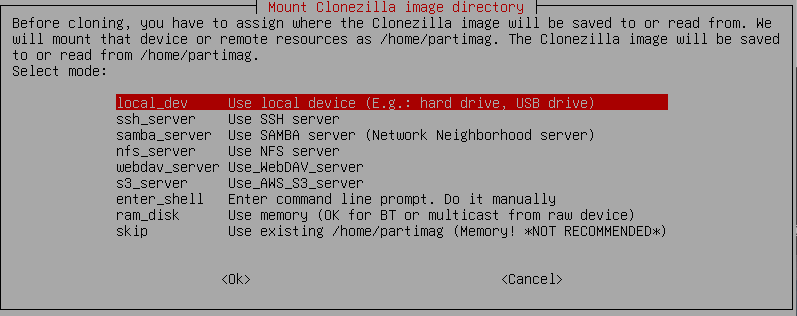
Select Device-Image
You can also use a webdav, nfs samba, or ssh server, but in our case we will use local_dev for the USB devices physically connected to the machine.

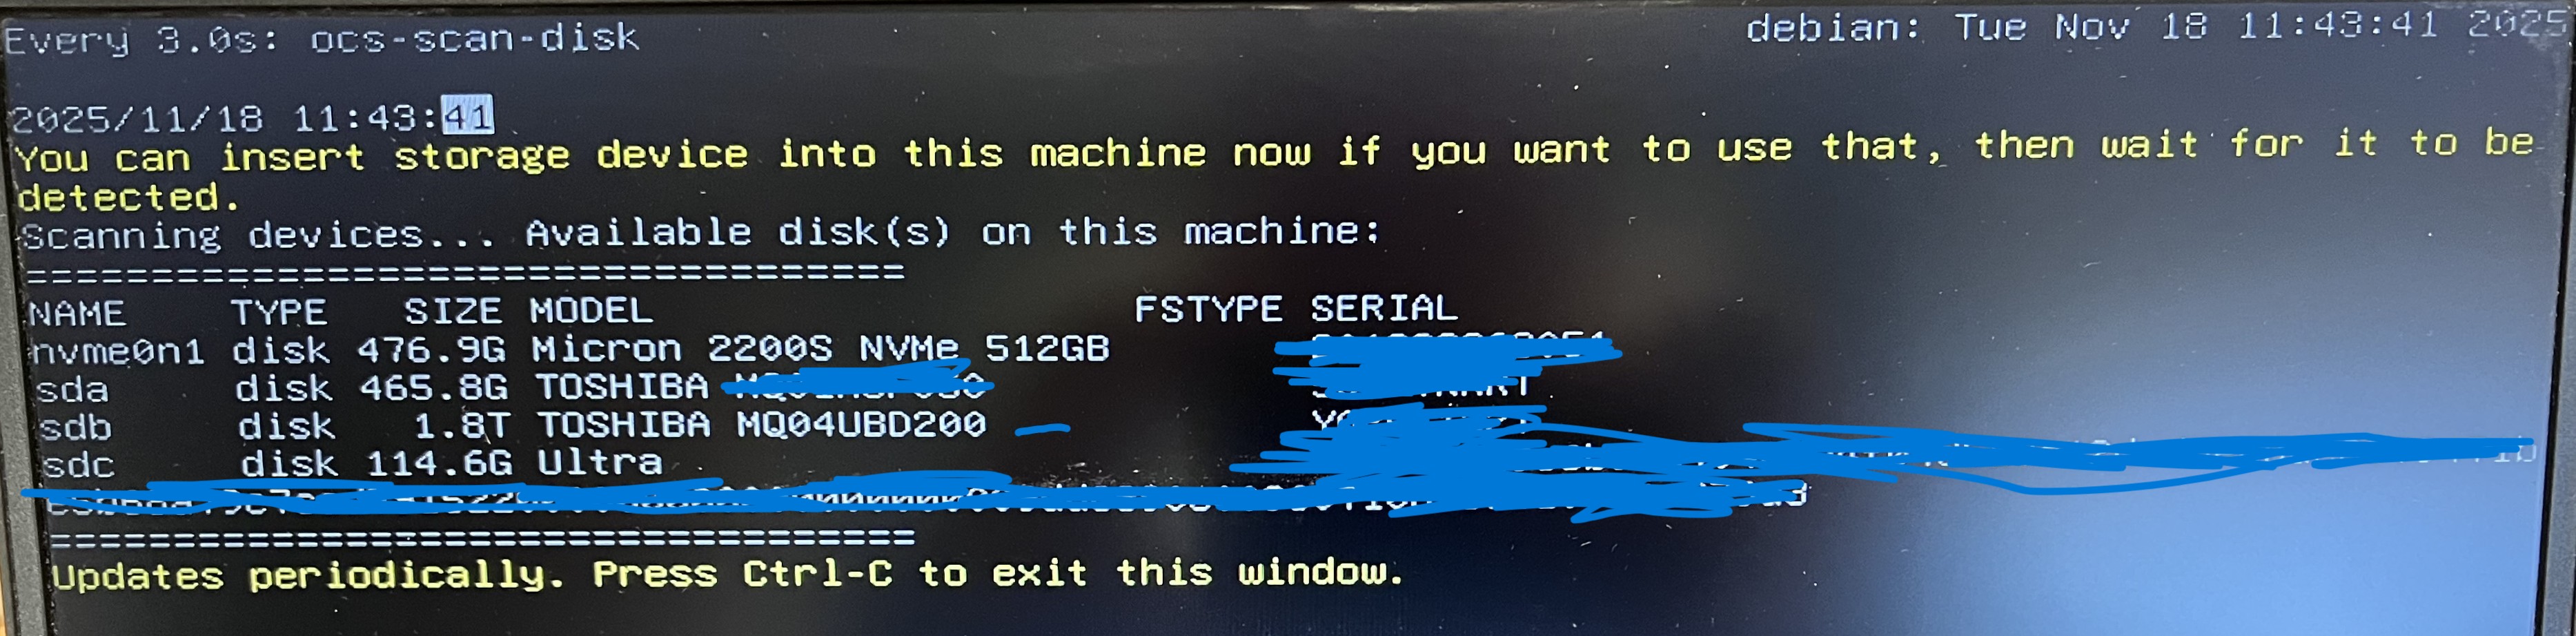
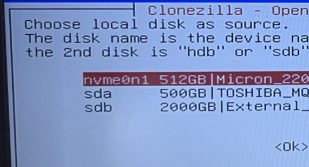
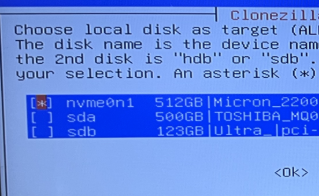
You need to make sure all your drives are there.
In my case, the SSD to be cloned is the 512Go (476.9G) Micron NVMe,
and my hard drive that will contain the image of the old machine will be the 1.8TB Toshiba.


Here you need to select the destination drive, in my case the Toshiba 1.8TB external hard drive.
Make sure your external hard drive is formatted as exFAT or NTFS, but not FAT32.
Also, ensure you have enough free space.

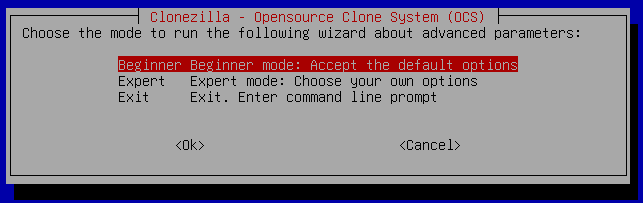
You can select beginner mode.
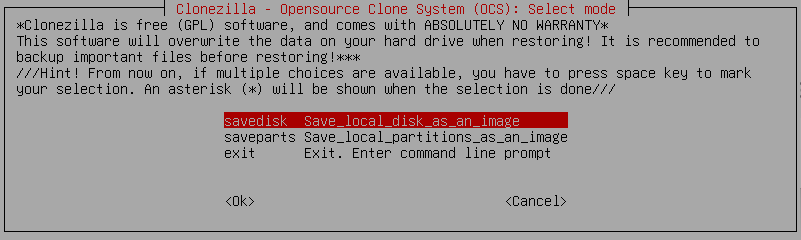
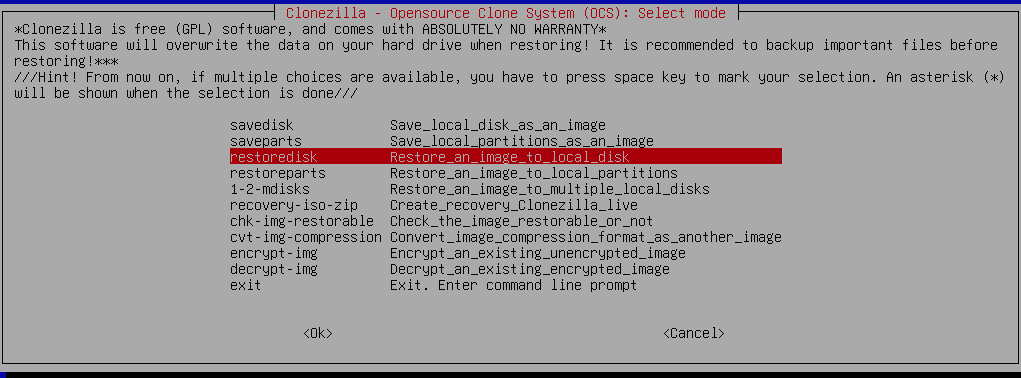
You can select save disk.

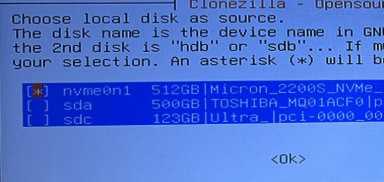
You can select the source disk (NVME).
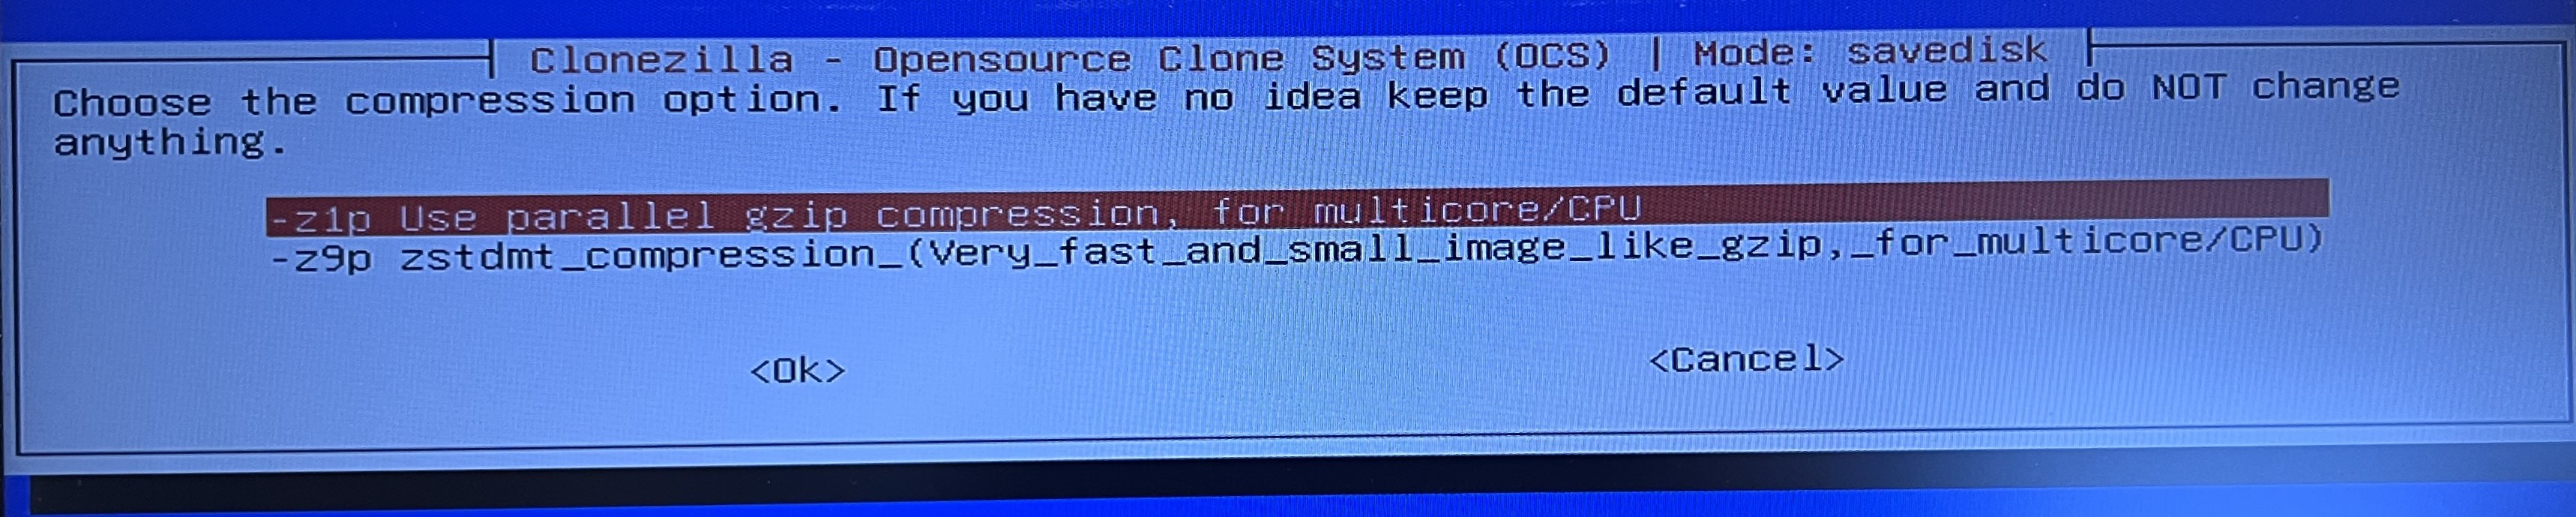
You can select use the parallel gzip compression for multicore.

Once the copying is complete, the computer should shut down, if you selected that option.
New Machine :
You need to make sure all your drives are there.
In my case, the SSD to be restore is the 1TB (953.9G) SAMSUNG NVMe,
and my hard drive that will contain the image of the old machine will be the 1.8TB Toshiba.
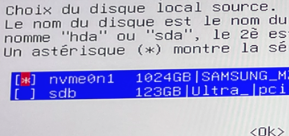
Choose the nvme.
Once the copying is complete, the computer should shut down, if you selected that option.
Cloning with the Network :
In my case, the SSD to be cloned is the 512Go (476.9G) Micron NVMe,
Old machine :
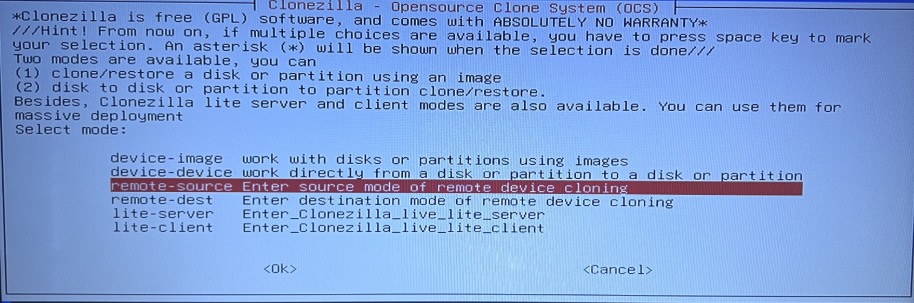
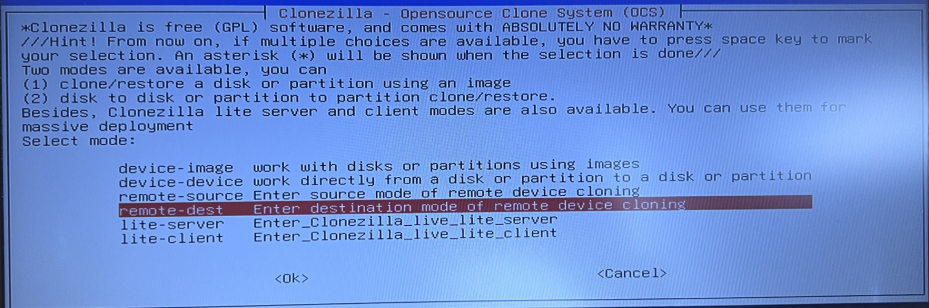
Select Remote-Source


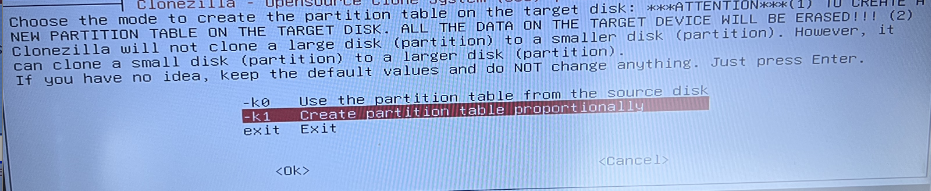
It depends on whether you are using the same disk size, for example 512GB to 512GB, in which case you can use k0.
But if you want to automatically partition the free space on your SSD using Clonezilla, for example 512GB to 1TB, you must use K1.

Please note : The ip Address is 192.168.1.175
New machine :
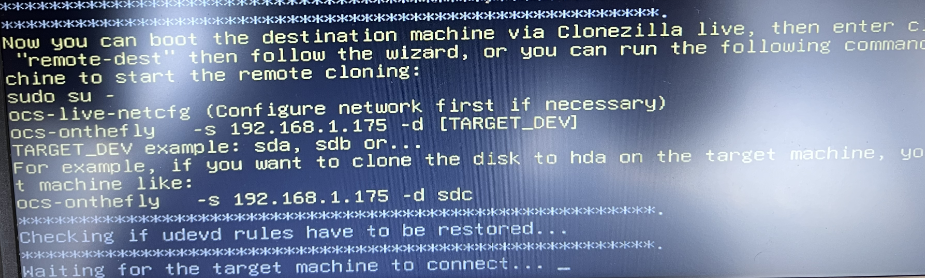
Select Remote-Destination

IP Address from the old machine.
Select the NVME of destination.
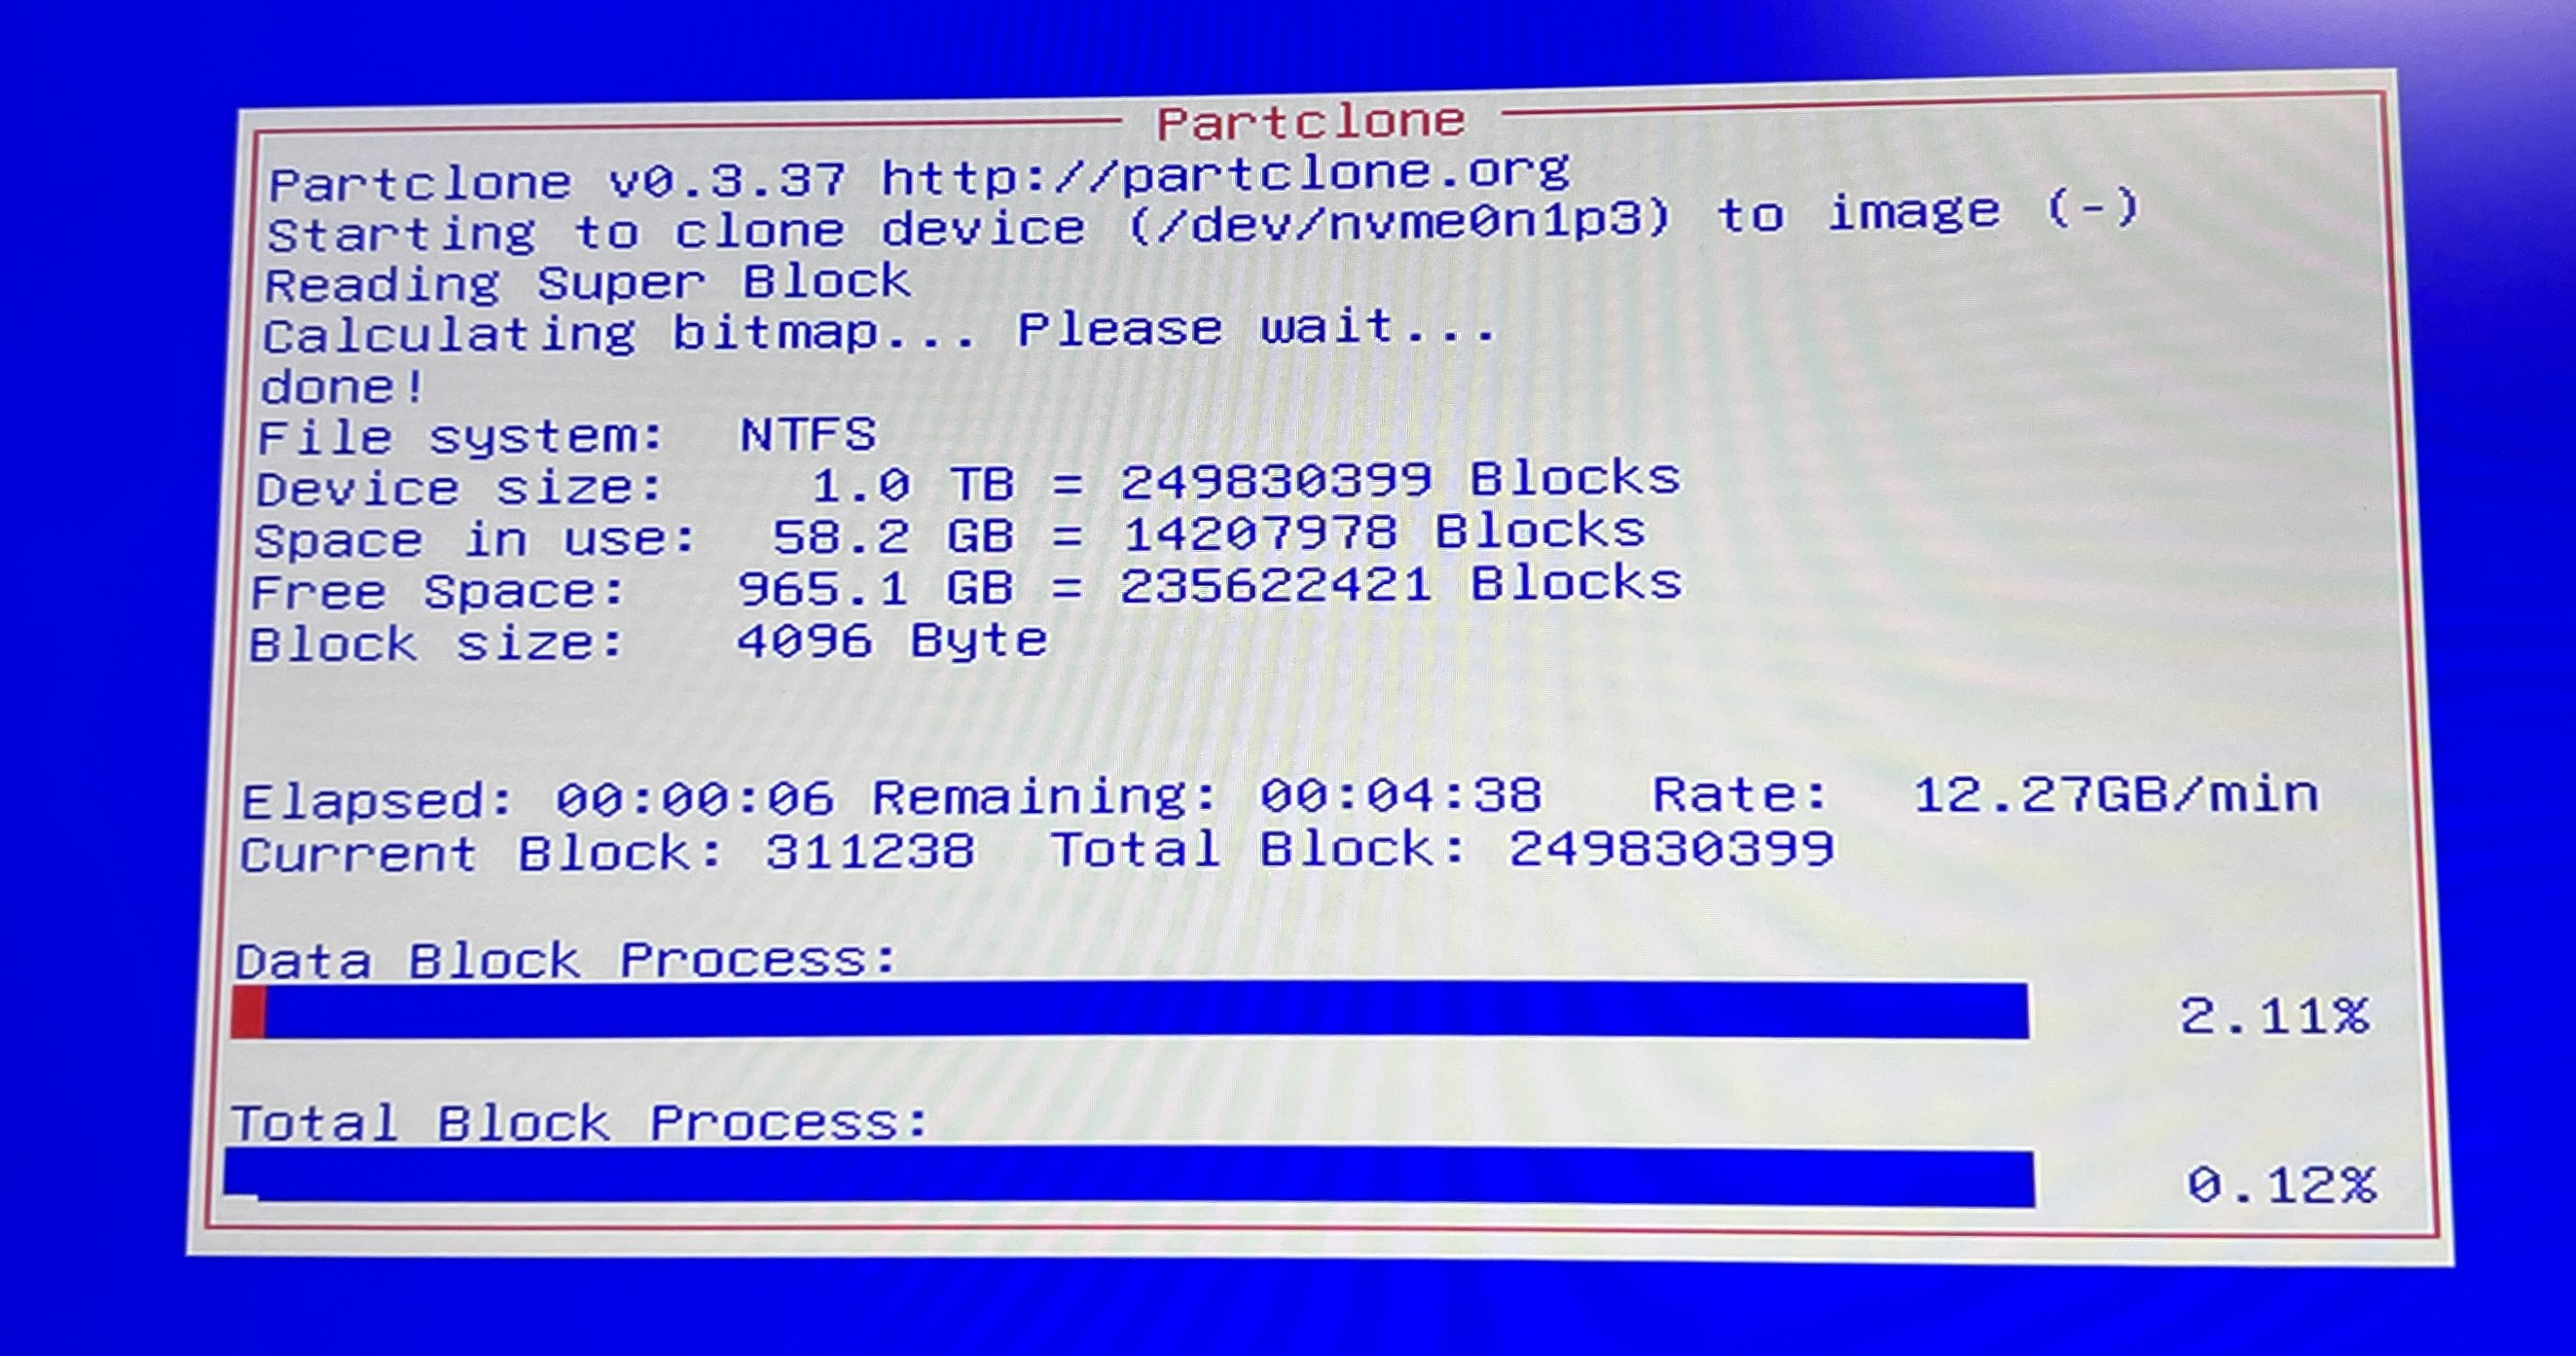
Wait.
SystemRescueCD
This method can be used to migrate virtual machines between multiple machines.
You can use it to migrate from VMware ESXi to Proxmox, or from one physical machine to another; there is no limit. However, this method copies block by block, so you must ensure that your destination disk is larger or of equal capacity.
Note that cloning can only be performed with the same or larger hard drive size.
It is essential that both machines can connect.
If the source machine uses UEFI mode, the target machine must also be configured in UEFI mode.
Similarly, if the source machine is running in Legacy mode, the target machine must also be in Legacy mode.
This method works for both Windows and Linux, as long as Linux can properly see the disk.
Copy machine overview :
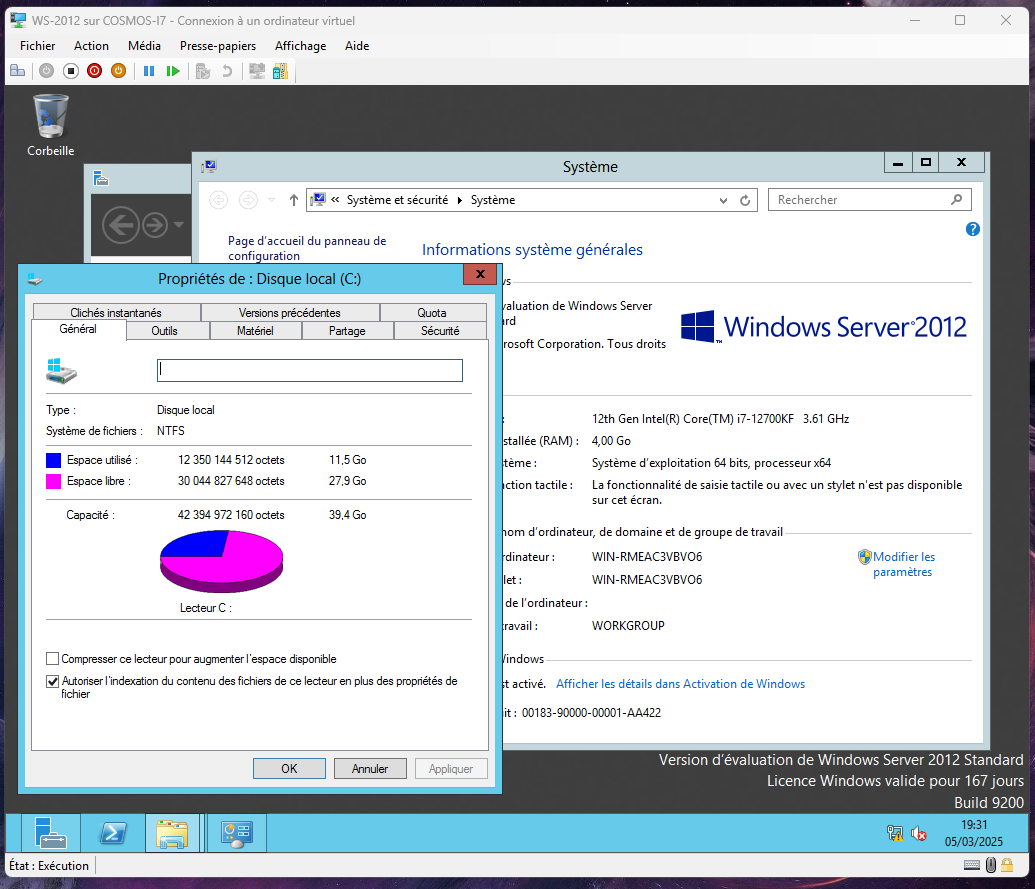
Note here :
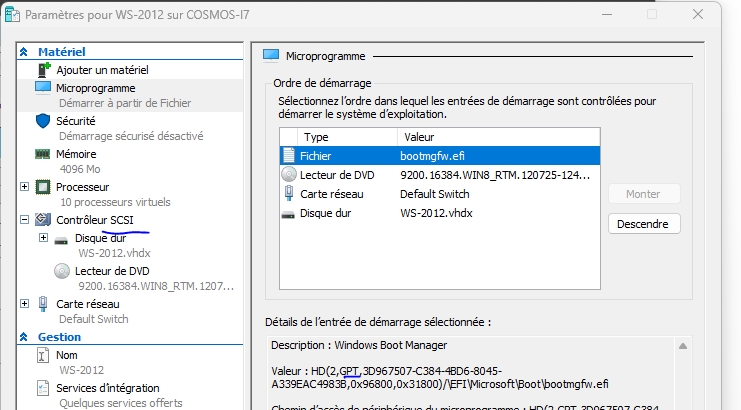
Hard drive: 40 GB SCSI
System installed in UEFI (Hyper-V Generation 2)
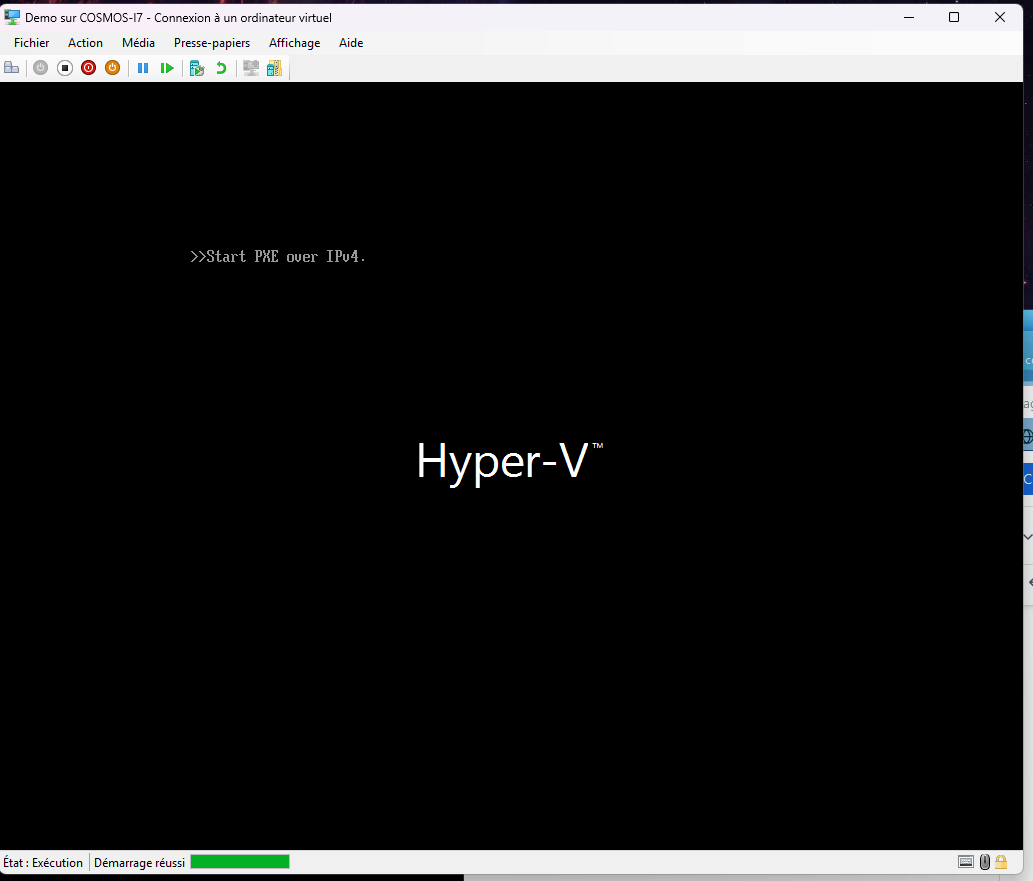
As you can see, my demo machine is empty :
Step 1 : Download SystemRescue CD
Step 2 : Boot both machines from SystemRescue CD
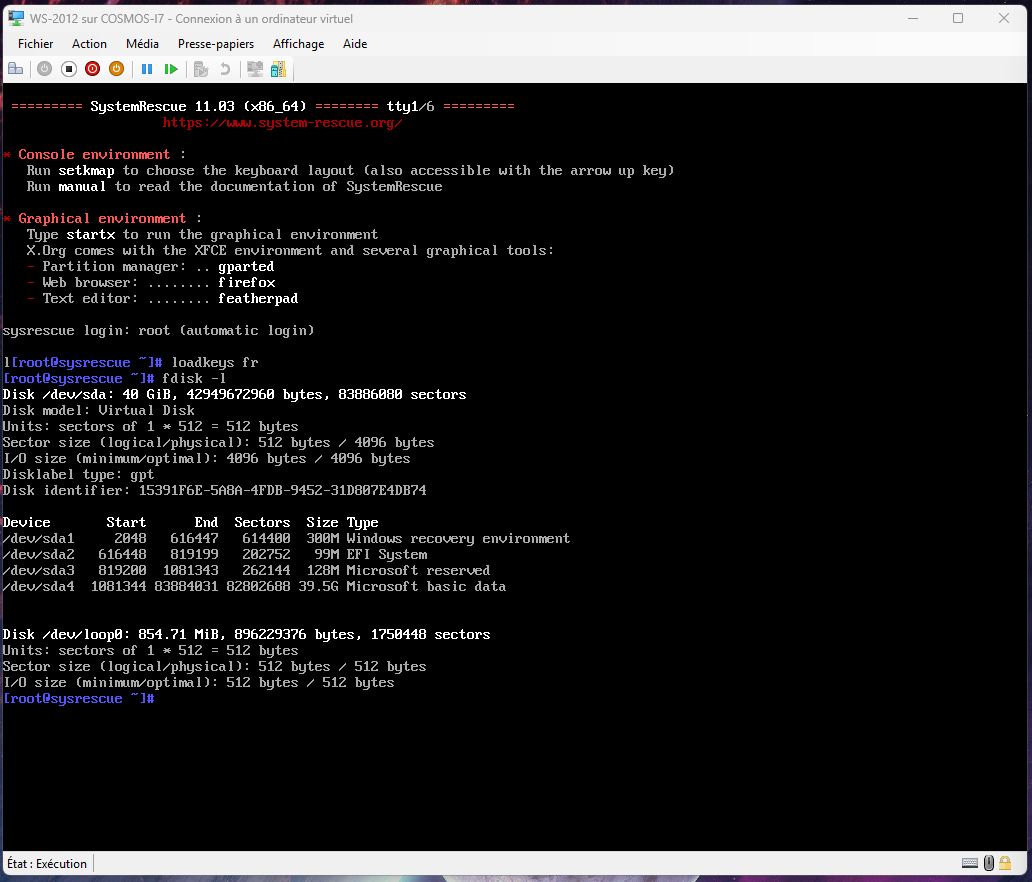
Machine with data :
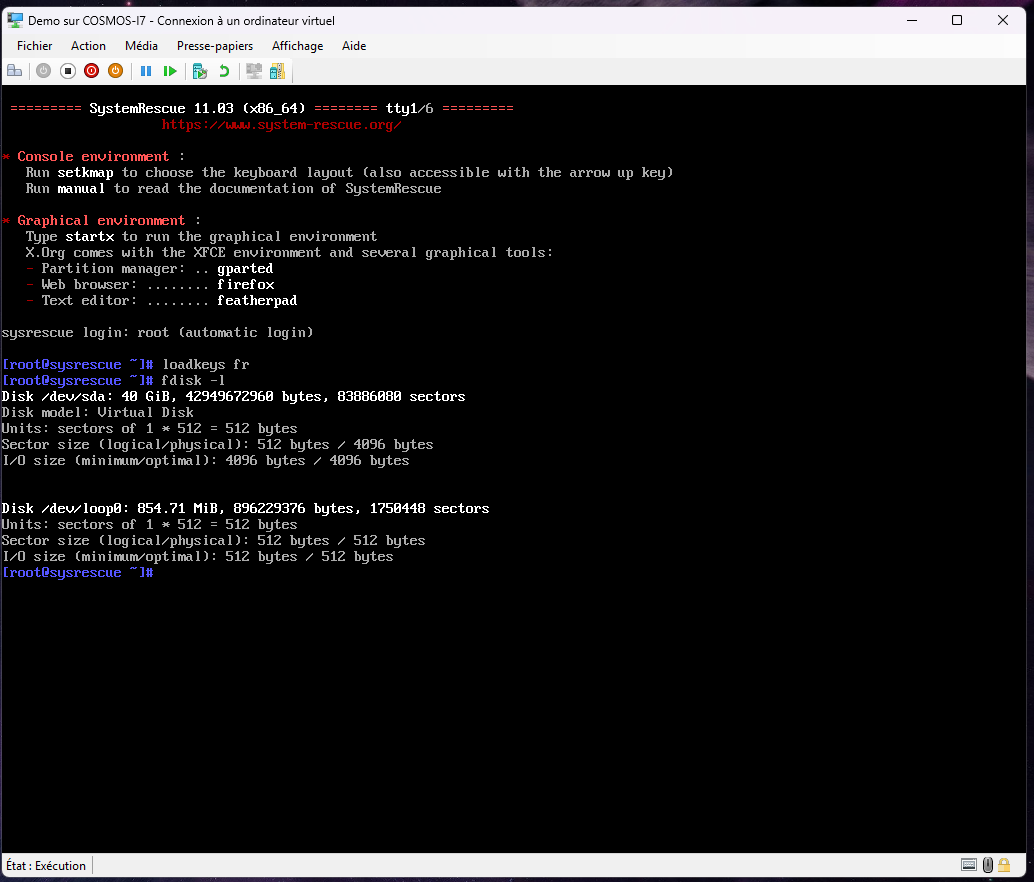
Empty Machine :
Step 3 : Preparing for cloning
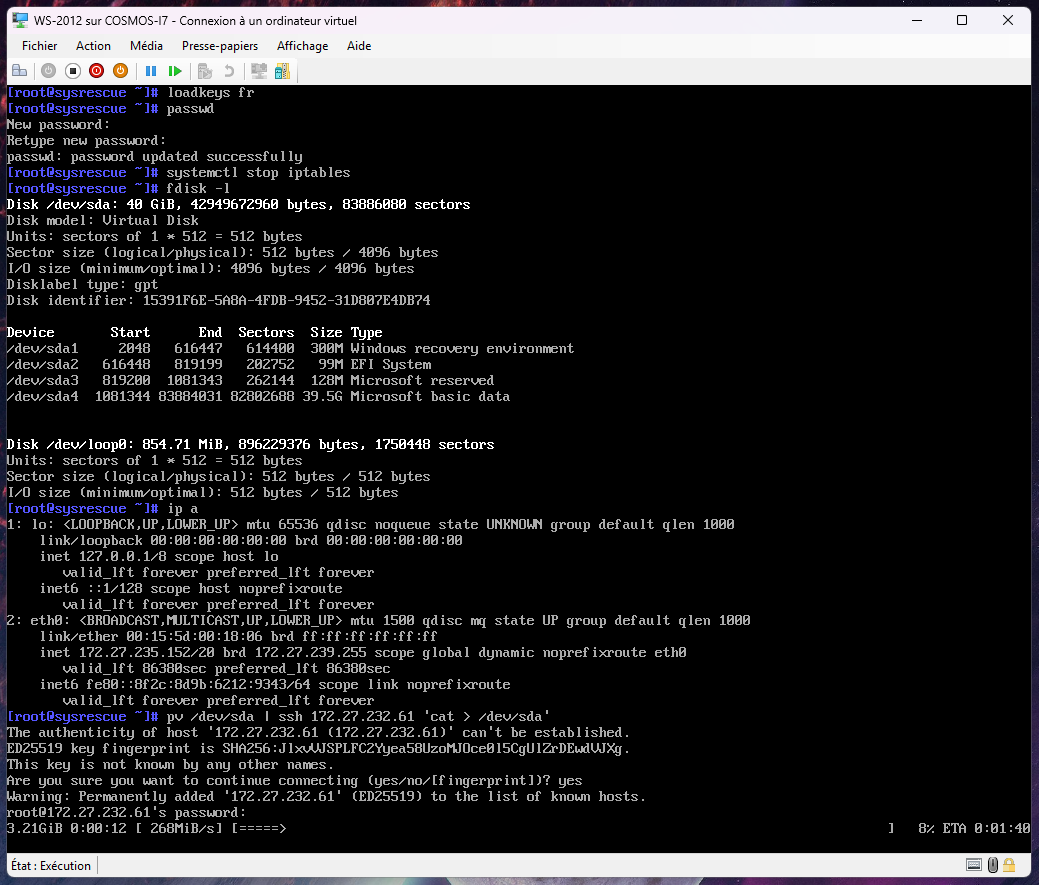
Set the keyboard to AZERTY :
loadkeys frSet a password for Root to access via SSH :
passwdStop the firewall that is blocking the SSH connection :
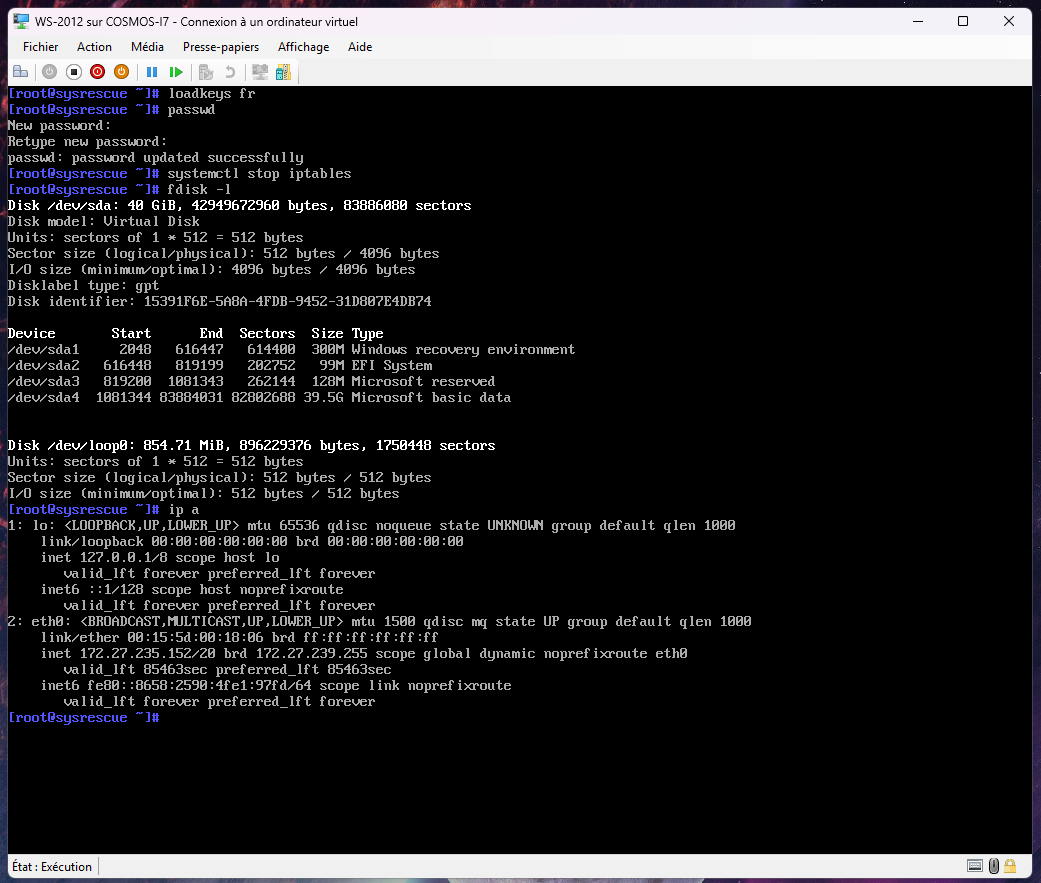
systemctl stop iptables Verify the correct disk to copy in both machine A and machine B :
fdisk -lIn my case, /dev/sda
Note the IP address of the machine to which you want to copy.
ip aStep 4 : Cloning
This is the IP address of machine B to be entered on machine A.
Therefore, the machine containing the operating system must tell the other machine to take the hard drive and send it via SSH to the other machine, to the other hard drive.
First option (quick): use the command CAT + PV (PV stands for time):
pv /dev/sda | ssh 192.168.0.1 'cat > /dev/sda'Here, 192.168.0.1 is used as an example.
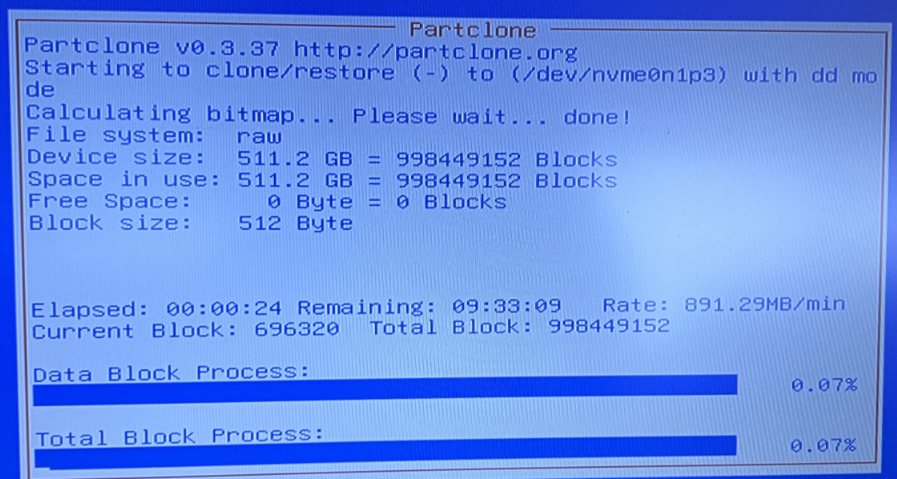
Second option (slow): use the dd command :
dd status=progress if=/dev/sda | ssh 192.168.0.1 'dd of=/dev/sda'Here, 192.168.0.1 is taken as an example.
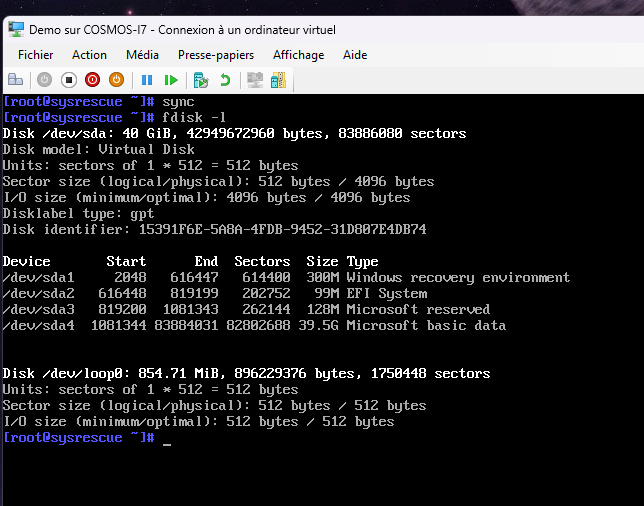
Step 5 : Synchronize the entries on both machines
To ensure that the cloning was successful and that there are no pending write operations, I highly recommend performing a sync after the operation.
syncThen you can restart/shut down the corresponding machines.
Demo :
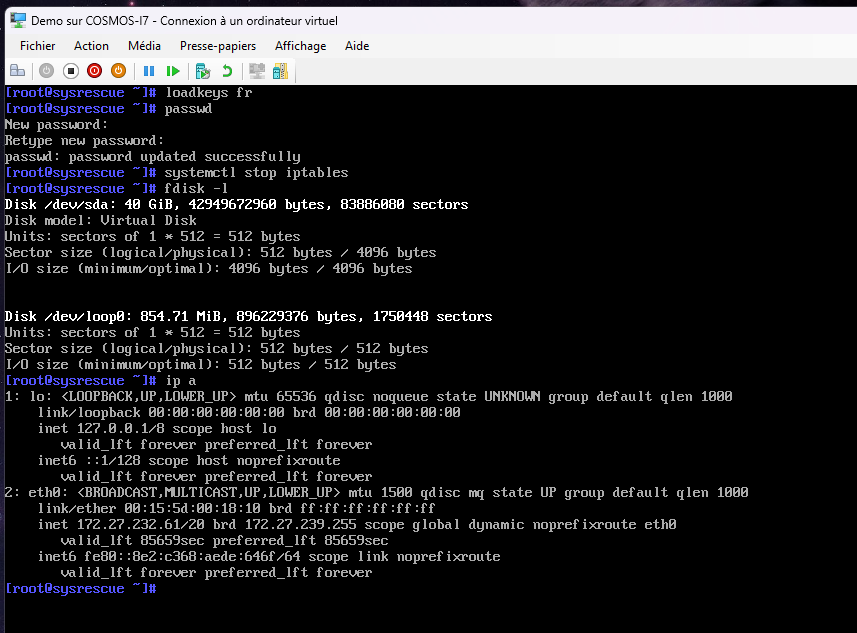
Note here: The IP address of the Demo machine. (Machine B) (Empty)
Only from machine A:
sync on both machines :

Machine B with the following data :
Restart :
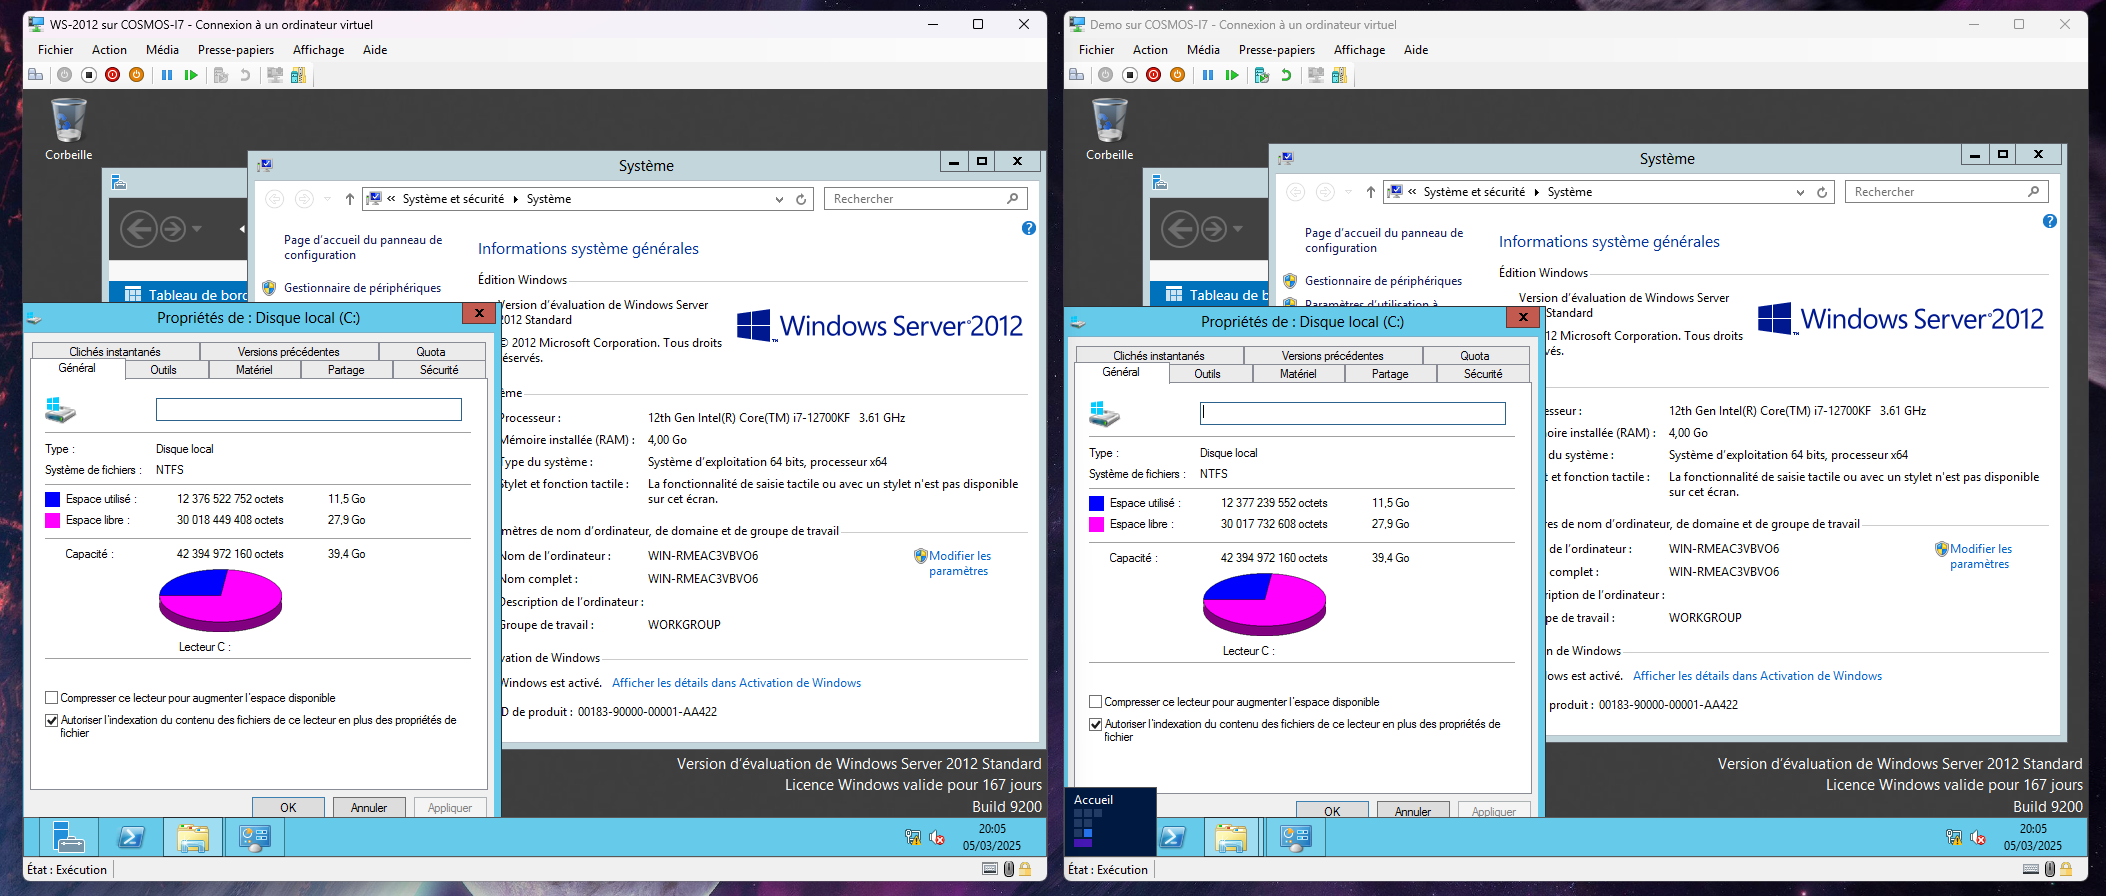
Clone successful, be careful, the network cards will change their MAC address and interface.